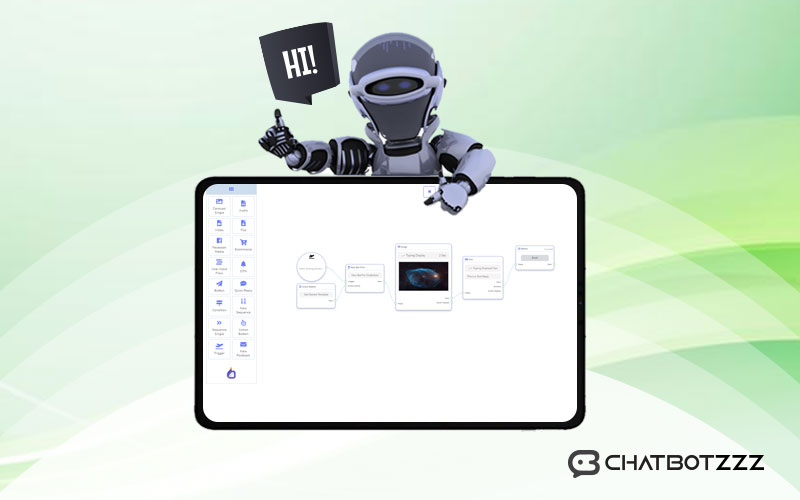
ChatPion has lately launched an Add-on called Visual Flow Builder. This helps to create a Messenger bot comfortably. This gives a bird’ eye view of the bot. This is just a drag and drops visual conversation Bot builder for Facebook Messenger. We can also add condition logic to the chatbot, so the bot can reply to different people differently. We can just drag and drop elements from the doc menu and connect them with a connector. All the actions that we need to do are visual, which makes the Bot building process super easy.
We will see how to create a bot using this ChatPion’s visual flow builder. First, we need to get the ChatPion Visual Flow Builder Add-on and install it with ChatPion.
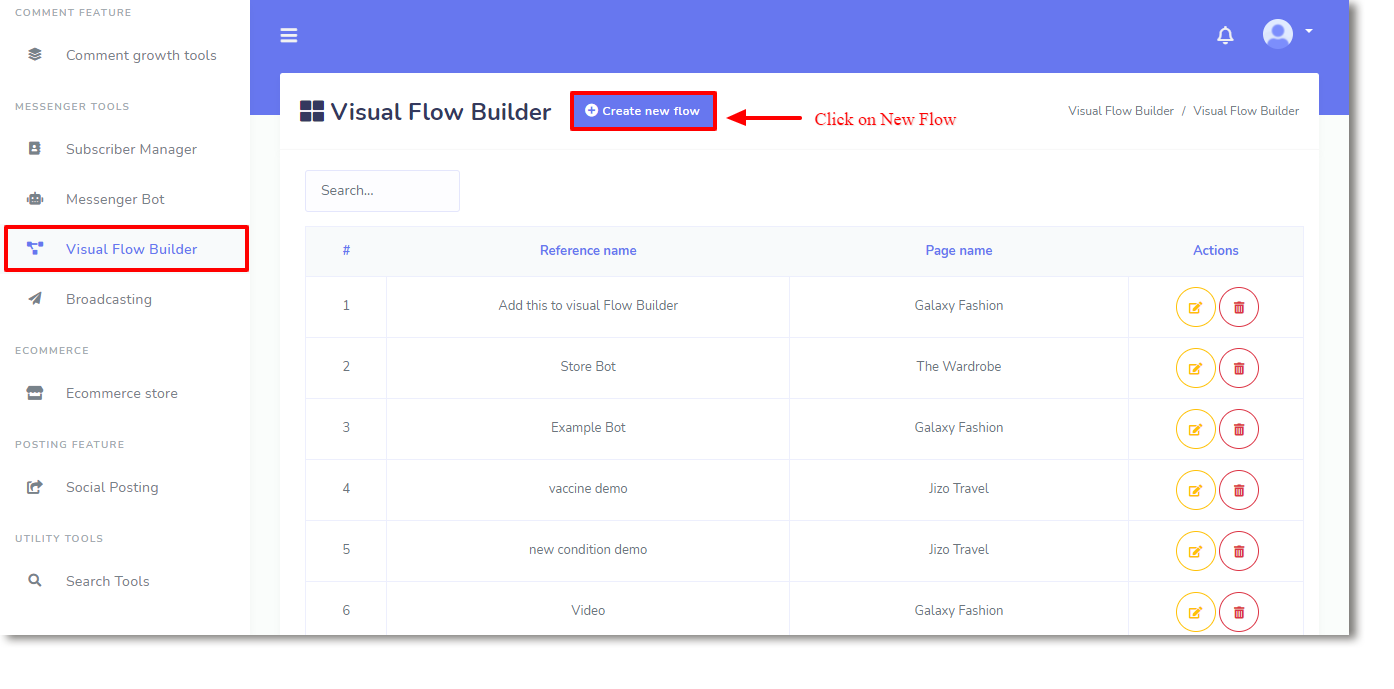
We will find the Visual Flow Builder option on the left navigation menu of ChatPion’s dashboard. Click on it and then click on the “Create New Flow”.
After we click on the “Create New Flow” this will ask us to select the Facebook Page, select the Facebook page to open the interface of the Visual Flow Builder. As soon as we do that, the canvas of the visual flow builder will open up. It has a doc menu, that contains all the elements needed to create a bot. We just need to drag the elements and drop them on the canvas, configure the elements and connect them accordingly.
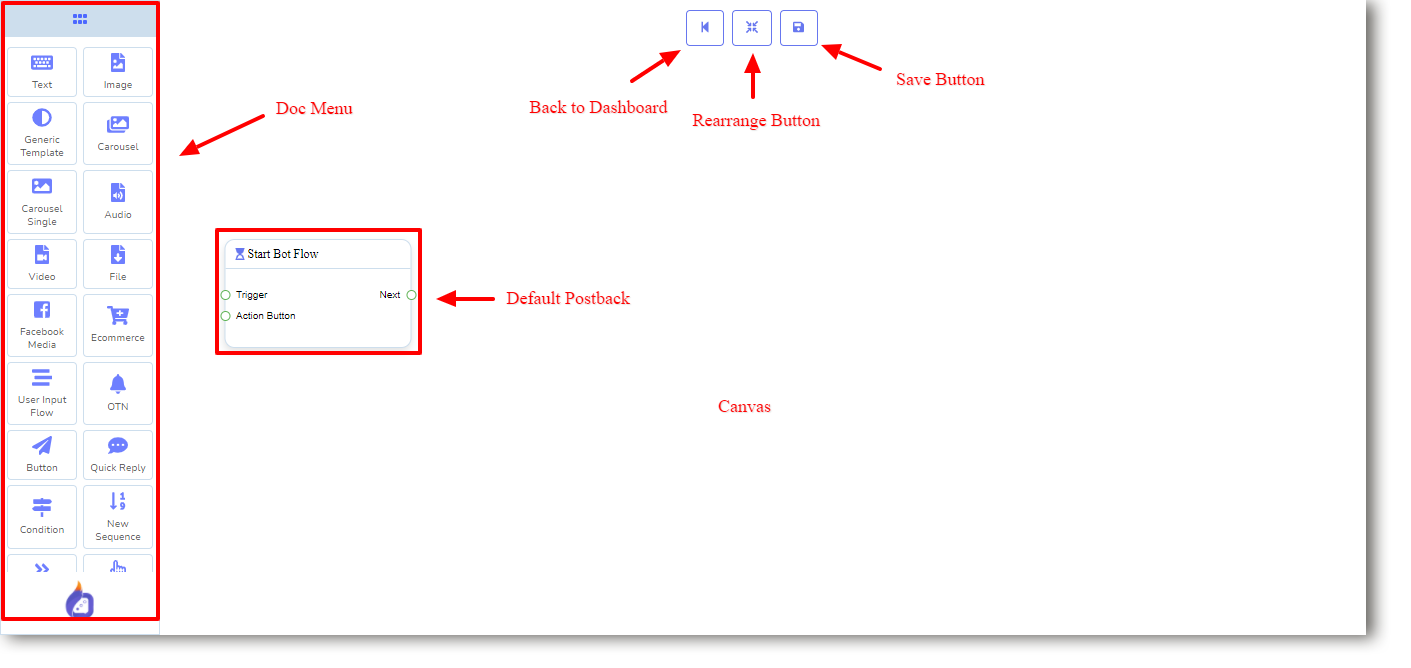
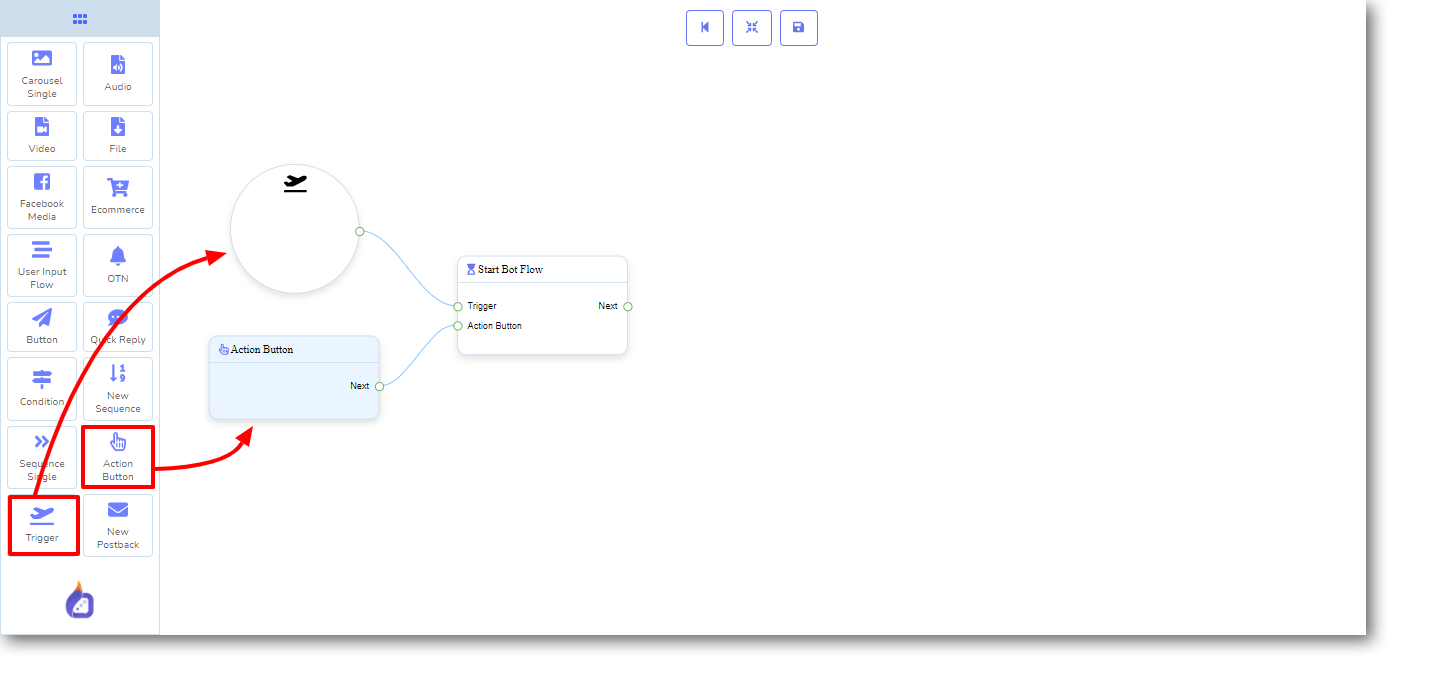
We can start the bot flow in two ways, we can use Trigger (Keywords) to start the bot, or we can use any action button. Drag the Trigger and/or Action Button from the doc menu and connect them with the “Start Bot Flow”.
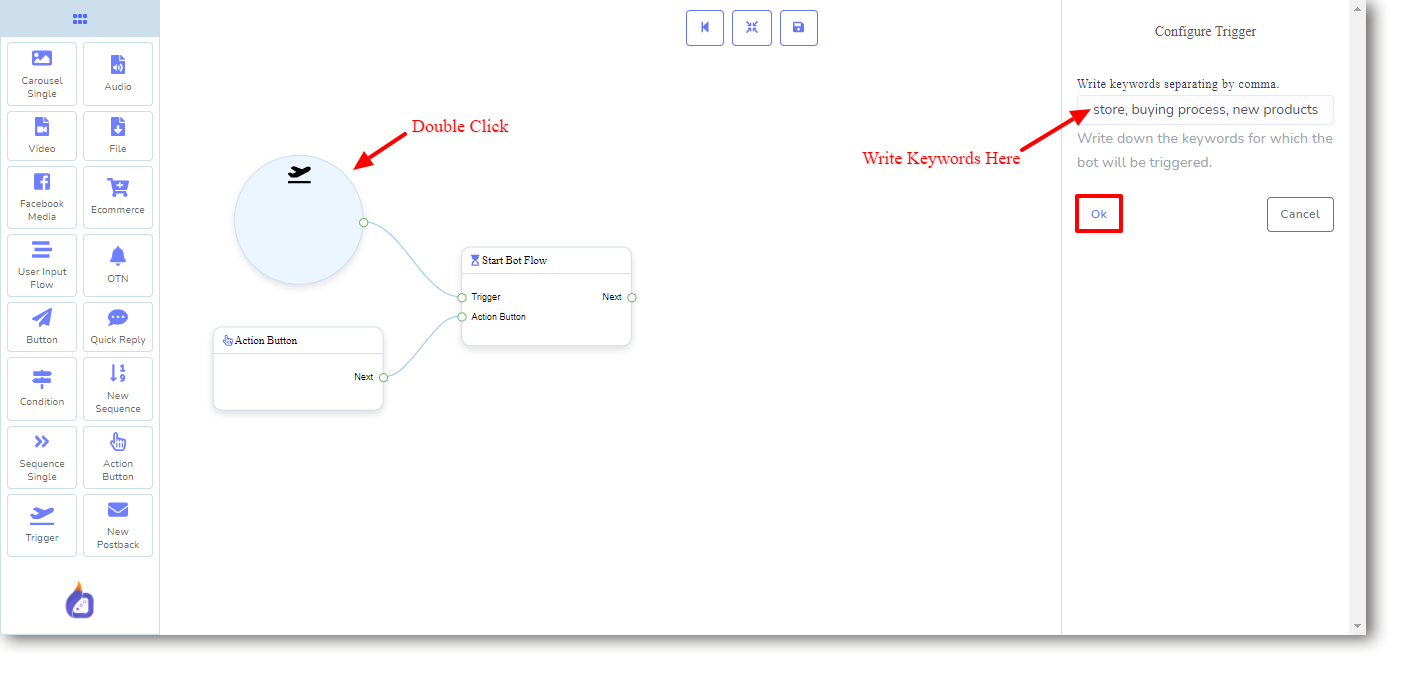
Configuring the Trigger:
Double click on the Trigger to configure it. When we double-click on it, the configure options will open on the right side of the canvas. From there write keywords separated with commas. And then click the “Ok” button.
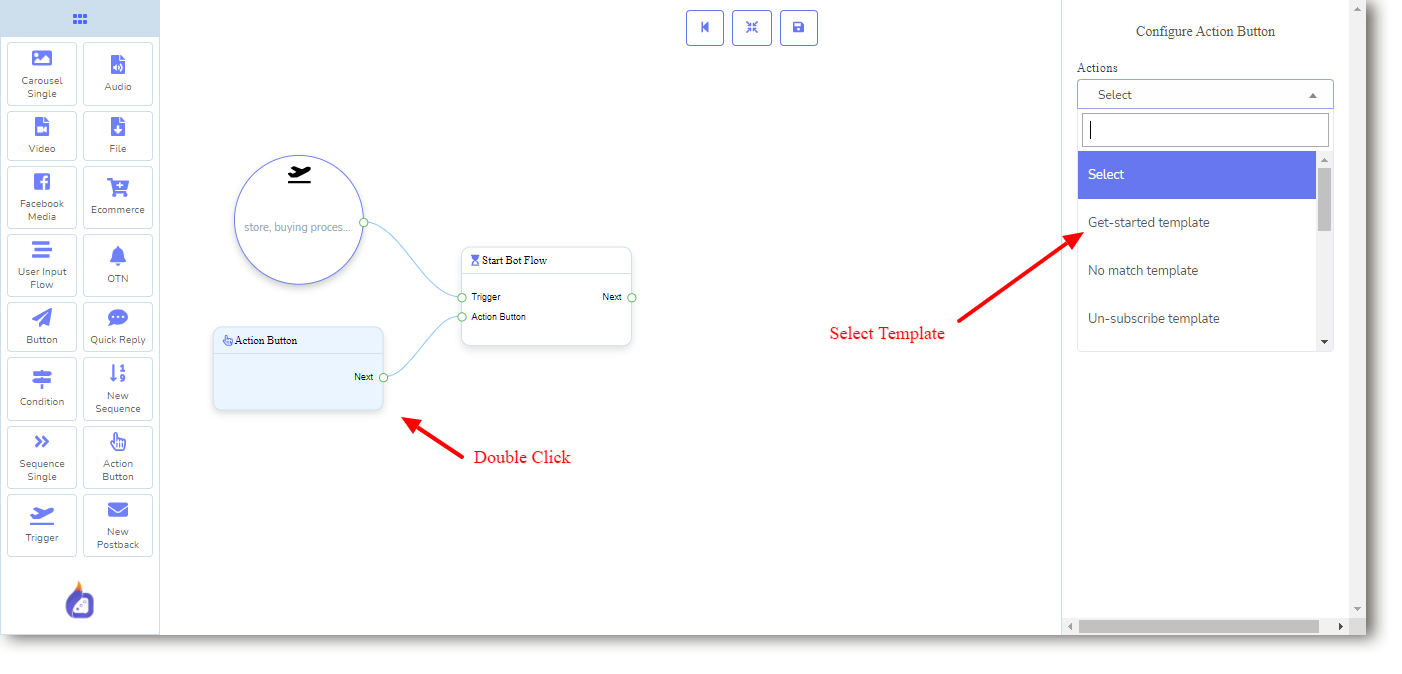
Configuring Action Button:
Double click on the Action Button and select the action button from the drop-down list. We can use Get Started Template, No Match Template, Un-subscriber templates, etc.
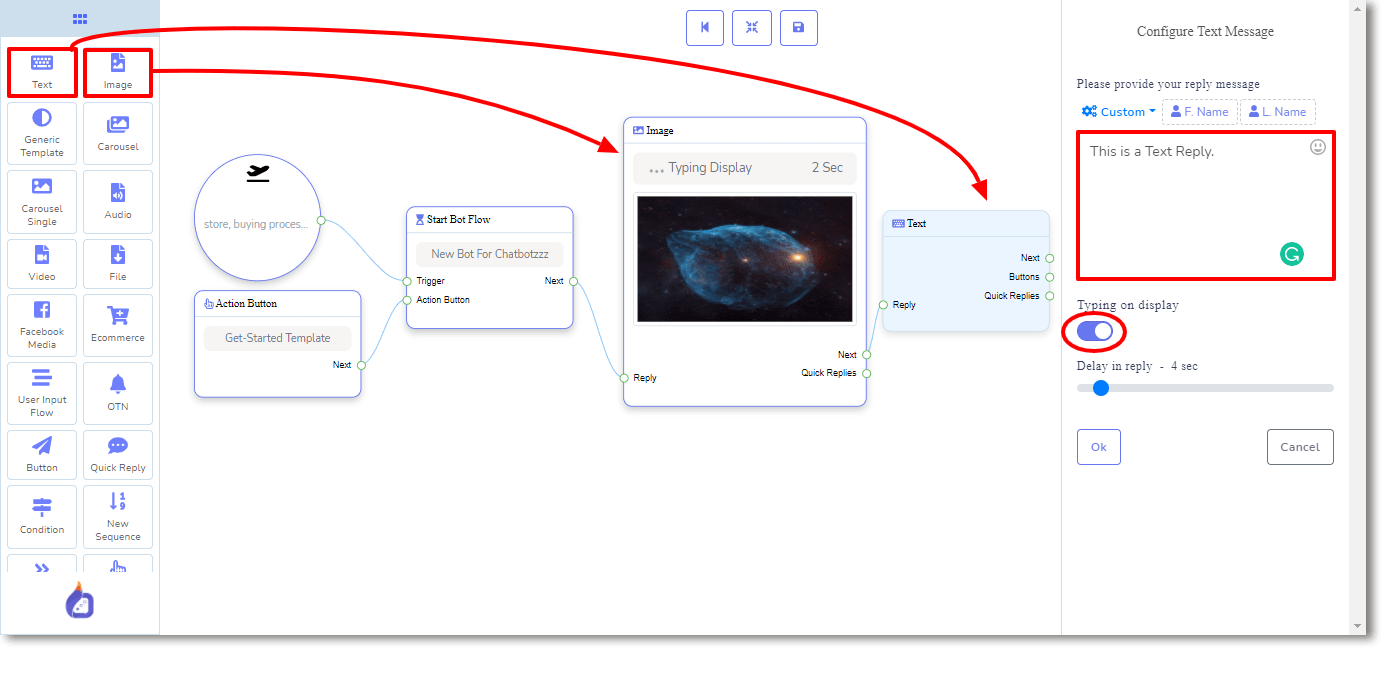
Whenever a user will type those keywords or click on Get Started button, this bot will start. From the “Start bot flow” (Default Postback) we can add Text replies, image replies, buttons, etc., and go on to set the bot in a way that, the Bot can intelligently converse with the user. We have all the necessary elements on the doc menu to use for that.
Now, let’s take an Image and then take a text reply from the doc menu. Upload an Image for the Image reply and set the text for the text reply. We can also enable Typing on display and time duration for that.
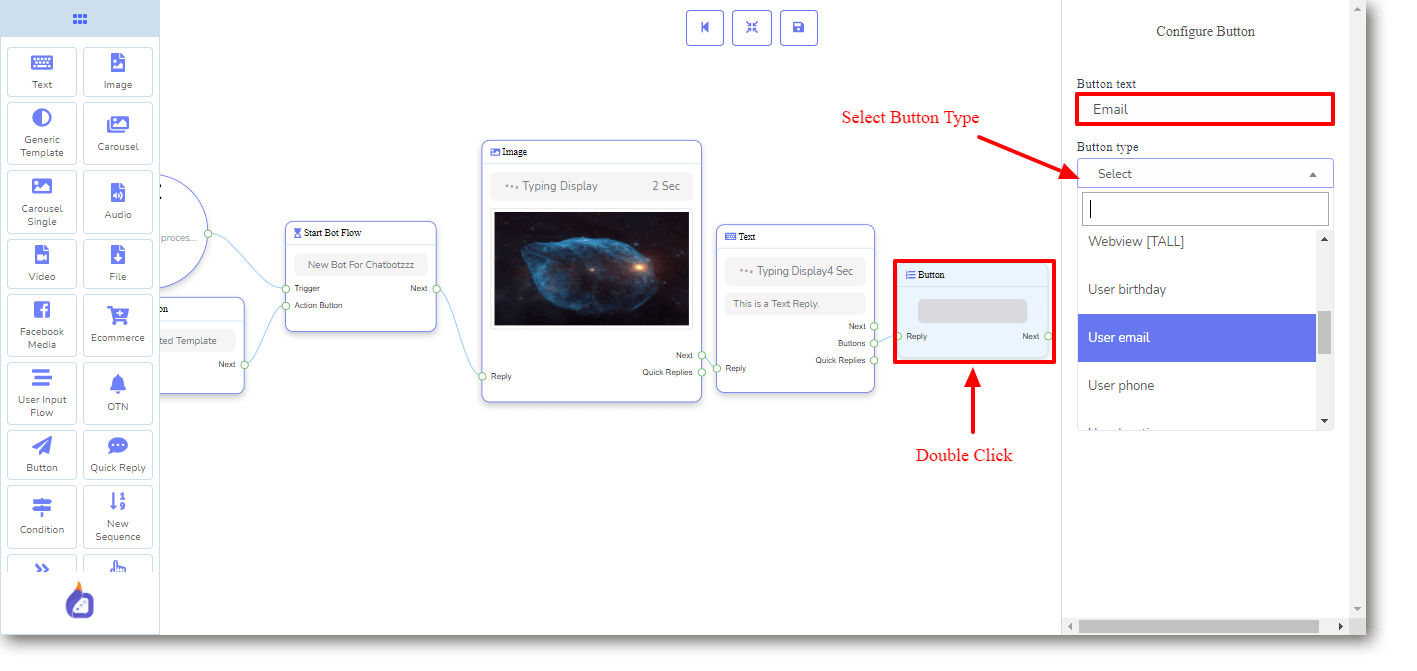
We can also add buttons after the text reply, and define what would happen when users click on the button. We can start a new Postback, redirect them to any URLs, collect email or phone numbers with a button. Double click on the button to give a button name and select the button type from the drop-down list.
We can also use conditions on the visual flow builder, for a true/false value the bot will give a different kind of reply. For example, we can put a condition to check the gender of the user and send message replies accordingly. For males or females, the reply will be different.
To understand the conditions fully you can watch this video from ChatPion.
We can also create carousel replies, Quick replies, Audio, or video reply. Even, the sequence has been integrated into the Visual Flow Builder to ease the process of creating the sequence for Facebook Messenger.