Features of ChatPion:
ChatPion is a complete social media marketing tool. It has lots of features like Messenger bot, Social media posting, Comment automation, eCommerce store builder inside or outside of Facebook messenger, QR code digital menu for restaurant, Messenger broadcasting, email broadcasting, SMS broadcasting, etc.
One of the most used features of ChatPion is Messenger Bot. By using this feature of ChatPion, anyone can build a Facebook Messenger bot without any coding knowledge. And the bot can continuously reply to messages on Facebook Messenger.
ChatPion Visual Flow Builder:
To make the bot building experience more pleasant and easier, ChatPion has introduced an amazing add-on named “ChatPion visual flow builder”. While the typical bot building process is a tedious and time-consuming job, visual flow builder is compelling and takes only a while to create a very much effective chatbot. The “ChatPion’s Visual Flow Builder” gives a bird’s eye view of the full chatbot, we can see the complete chatbot on the canvas of the visual flow builder. We just need to get the add-on from ChatPion’s creator Xerone IT’s official website and install the add-on on ChatPion.
How to create a chatbot by using the “ChatPion Visual Flow Builder”:
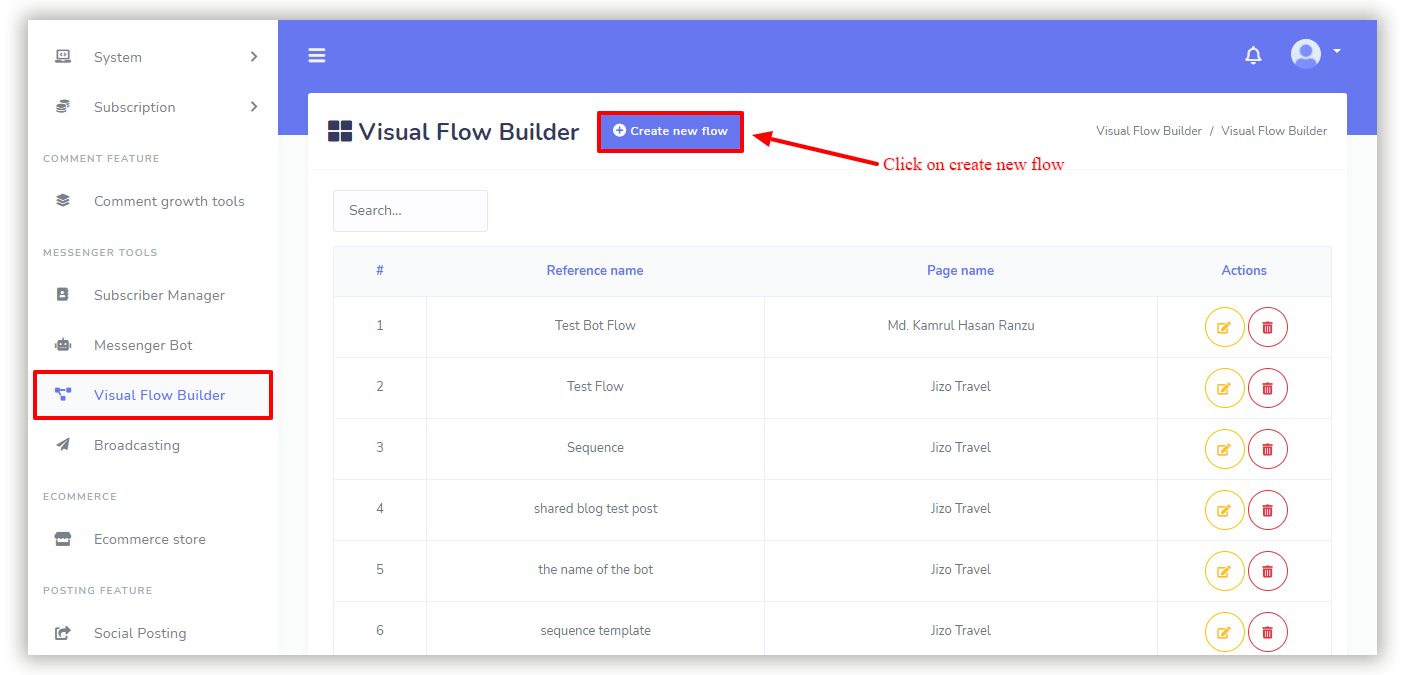
When we have installed and activated the add-on, we will see the “Visual Flow Builder” option on the left navigation menu of ChatPion. As soon as we click on the “Visual Flow Builder”, a page will appear with a list of all the bots that are created using visual flow builder and a button at the top “Create New Flow”.
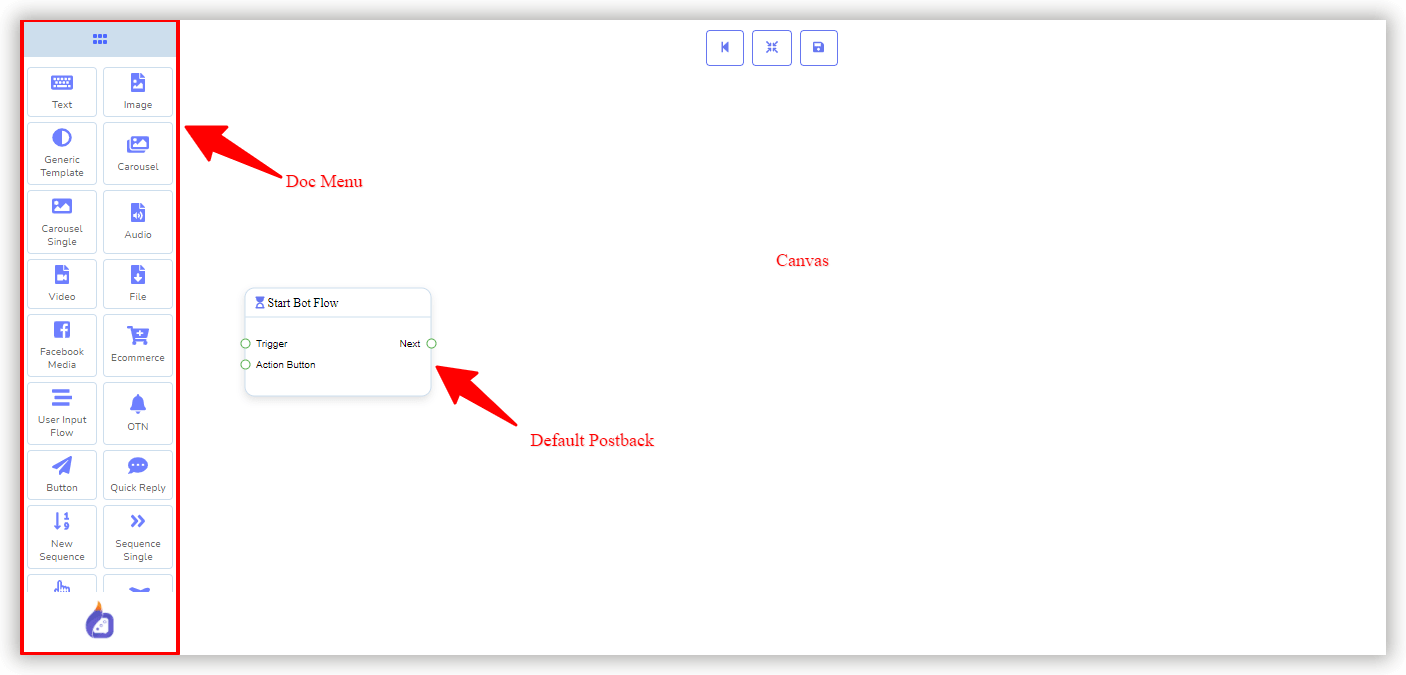
When we click on the button, it will ask us to select the Facebook page for which we want to build the bot. As soon as we do that, the interface of the Visual Flow Builder will appear. It has a doc menu and a canvas; we will find all the necessary components on the doc menu. It’s just a drag and drop chatbot creator, we need to drag our necessary components or elements from the doc menu and drop it on the canvas, then put data for the components and connect them with a connector accordingly.
Process of creating a chatbot with an example:
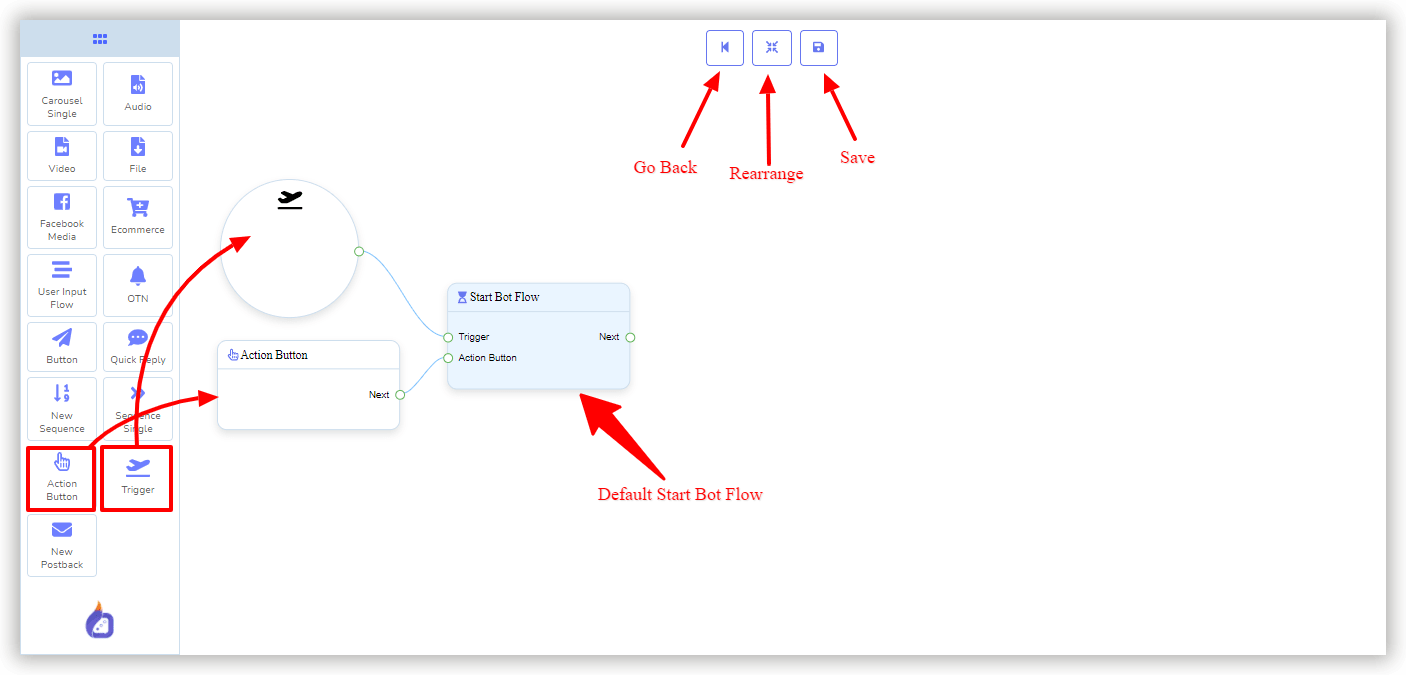
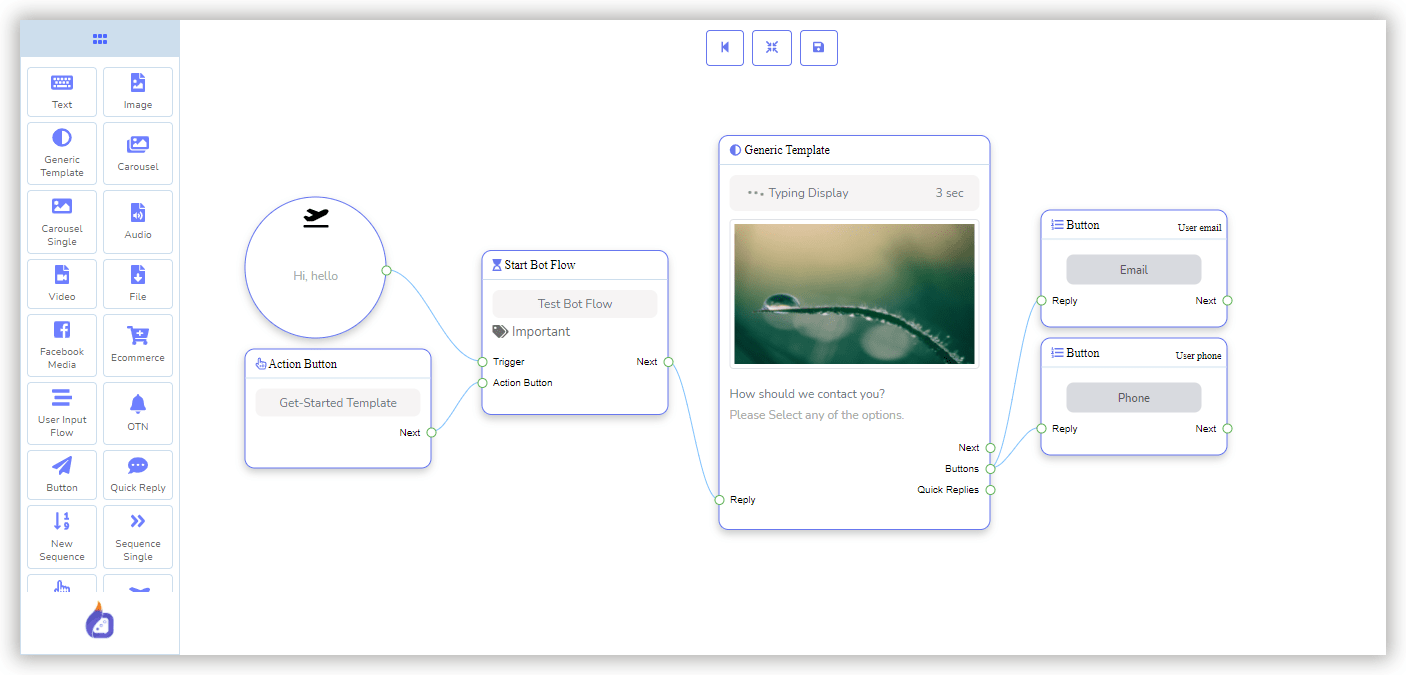
In the canvas of the visual flow builder, there is a default “Start Bot Flow” component or element, which is a postback. We have to start from there, this element can be connected from two types of element, one is Trigger and the other one is Action Button. We can drag the Trigger or Action button from the doc menu and connect any or both of them with the “Start Bot Flow”. The Trigger is nothing but a group of Keywords, for which the bot will start. And the Action buttons could be the Get started template, No-match template, Un-subscribe or Re-subscribe template, Email Quick reply template, and many more.
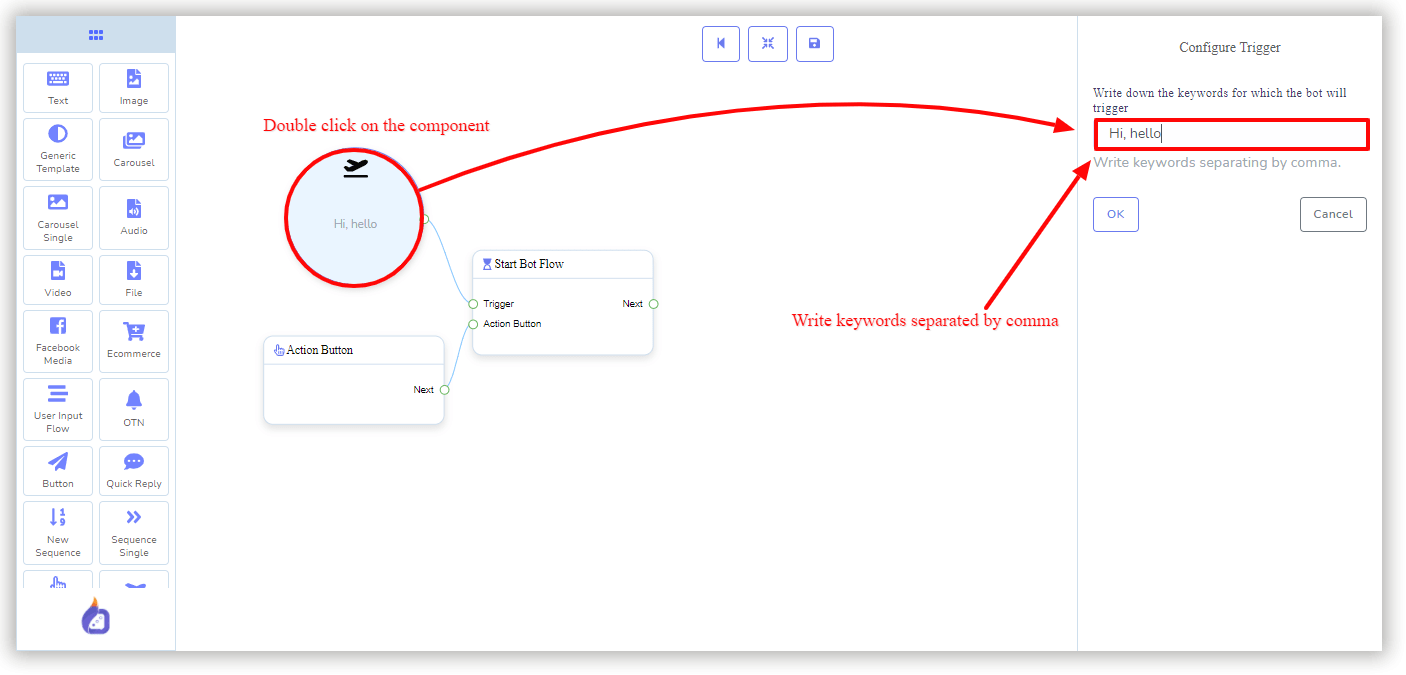
To configure Trigger or the Action button, double click on the element an option will appear on the right side of the canvas. We can add keywords for Trigger and can select the Action for Action button from there.
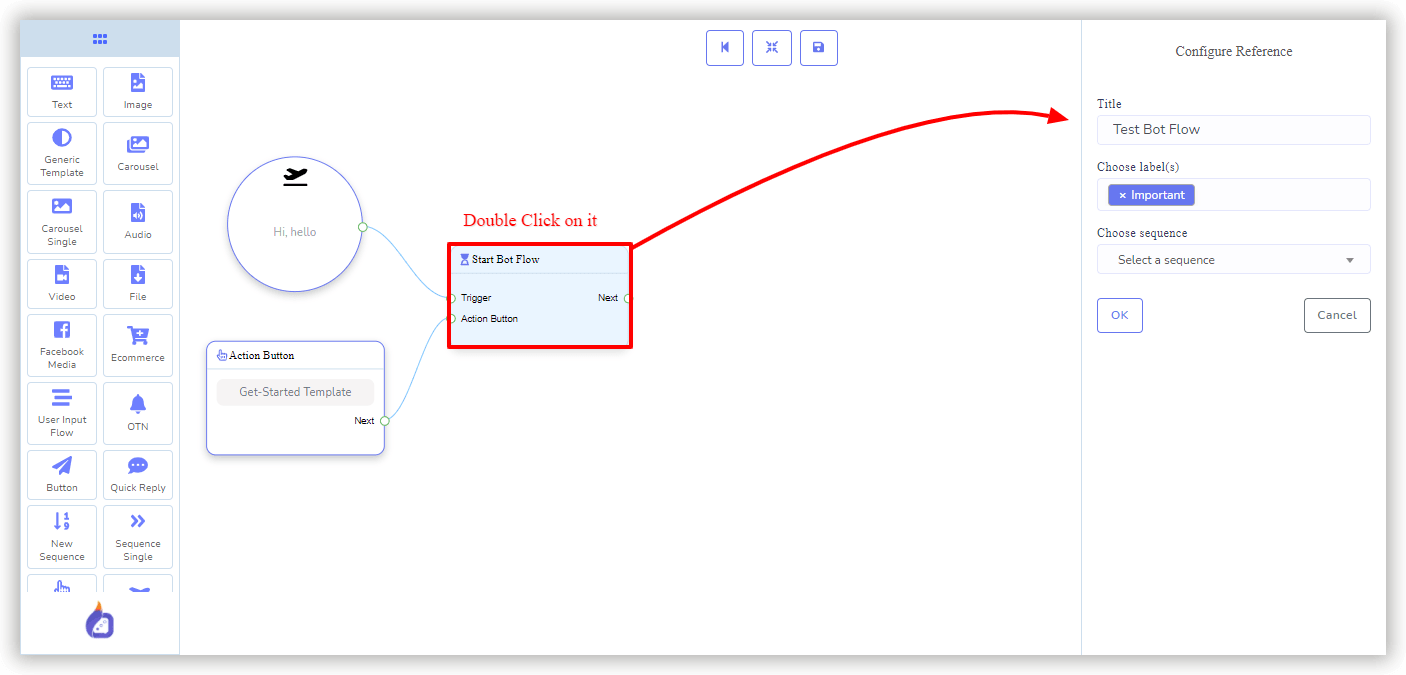
Because I have added both trigger and action button, this Bot can start from both the way, it could be triggered by keywords or by the Action Button. We can use any or both of them. We also need to configure the “Start Bot Flow”, we must give a name for it and we can choose labels and sequence if we want to.
Now, we will add a reply to the bot, there are many types of replies we can use. There are Text, Image, Audio, Video, Carousels, etc. which could be used as a reply. There are more like, generic template, Quick reply, and buttons. These all are a very fantastic way to send a reply on the messenger.
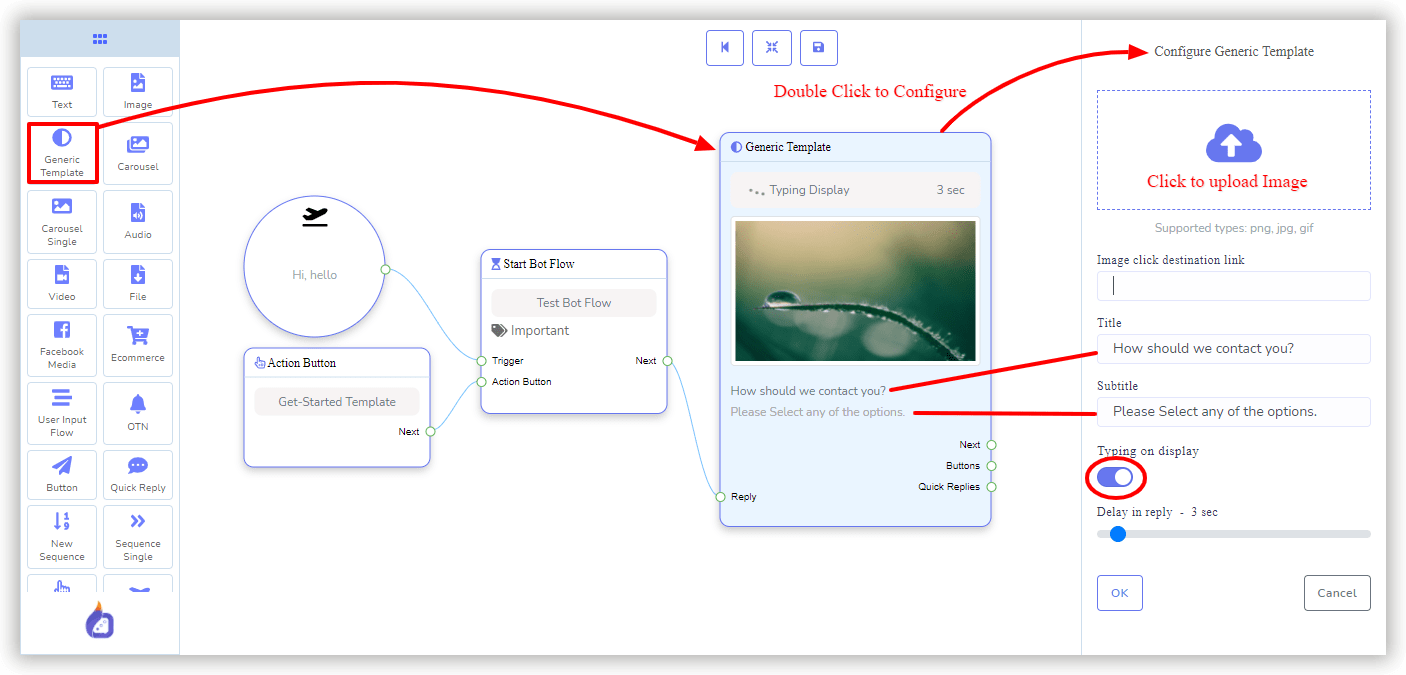
Here in the example, I am using a generic template for the first reply. We can add an image on the generic template also we can make the image clickable by adding a link with the image. We can also enable Typing on display and set the time duration of the delay.
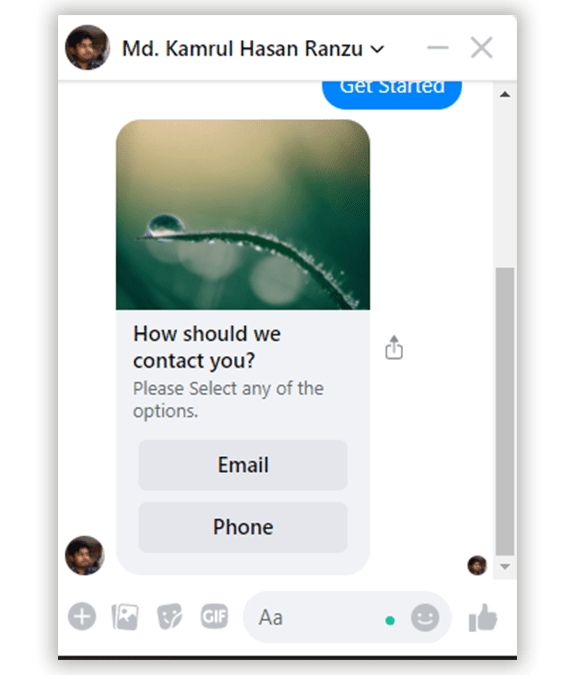
Now we can add the next reply, buttons, or quick reply with the generic template. We can add multiple buttons and define what will happen when they click on the buttons. In this example bot, I have added 2 buttons to collect their email and phone number.
This bot will look this way in the messenger.
Besides, we can use an eCommerce store or store products on a carousel as a reply, which means if anyone is looking to buy any products we have, we can redirect them to the eCommerce store inside/outside of the Messenger and sell the product to them. We just need to set the bot that way.