In the previous article, we have talked about how to create Email and SMS Broadcasting from ChatPion. In this article, we will deep dive into Messenger Broadcasting. Facebook has some restrictions on Messenger Broadcasting. If we don’t follow the rules of Facebook while broadcasting through Facebook Messenger, Facebook may block the messaging feature permanently for that particular Facebook page. Therefore, we have to broadcast through Facebook Messenger in a certain way that we don’t break the Terms and conditions of Facebook.
Facebook Allows only 3 Types of Messenger Broadcasting.
- OTN (One Time Notification) Subscriber Broadcast
- 24H promotional (Send a promotional message within 24 hours of the conversation) and
- Non-Promotional (With Tag only).
We will go through the details of these Facebook’s terms and will see how to do the broadcasting effectively from ChatPion.
OTN (One Time Notification) Subscriber Broadcasting:
One of the best ways to send promotional messages on Facebook Messenger is OTN. “OTN” means One Time Notification. This OTN works by taking permission from the subscriber by a “Notify Me” button. Only when a subscriber hits the “Notify Me” button to accept a promotional message, Facebook allows a page to send only one message within a year. This is a permission from the user to send them a promotional message. This is a safe way to send a promotional message to the subscriber.
How to create OTN and broadcast to its subscriber:
Step 1 (Create the OTN):
First, we need to create an OTN Post back and integrate it into the Messenger bot. To create an OTN postback, from the left navigation menu, go to
Messenger Bot->OTN Post-back manager->Options->Manage Template.
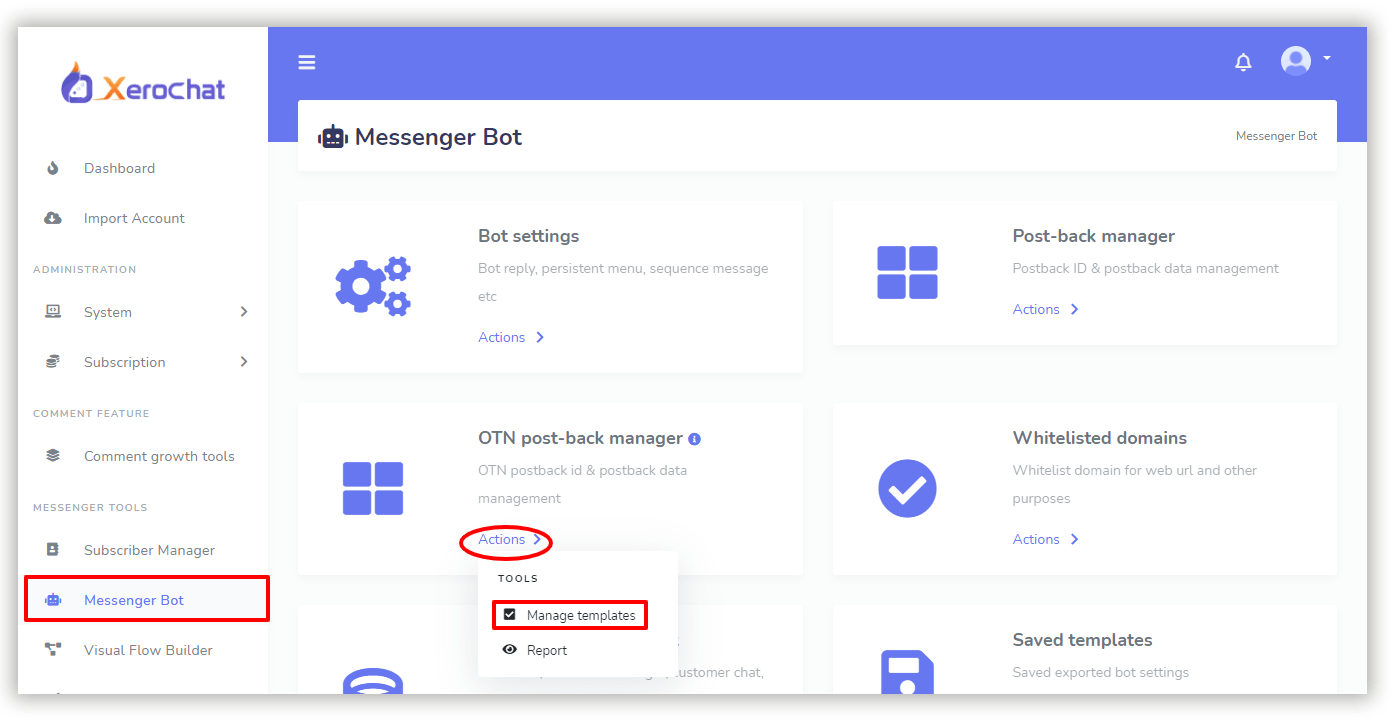
A page will appear with a list of OTN (Previously created) and a button named “Create new OTN template”.
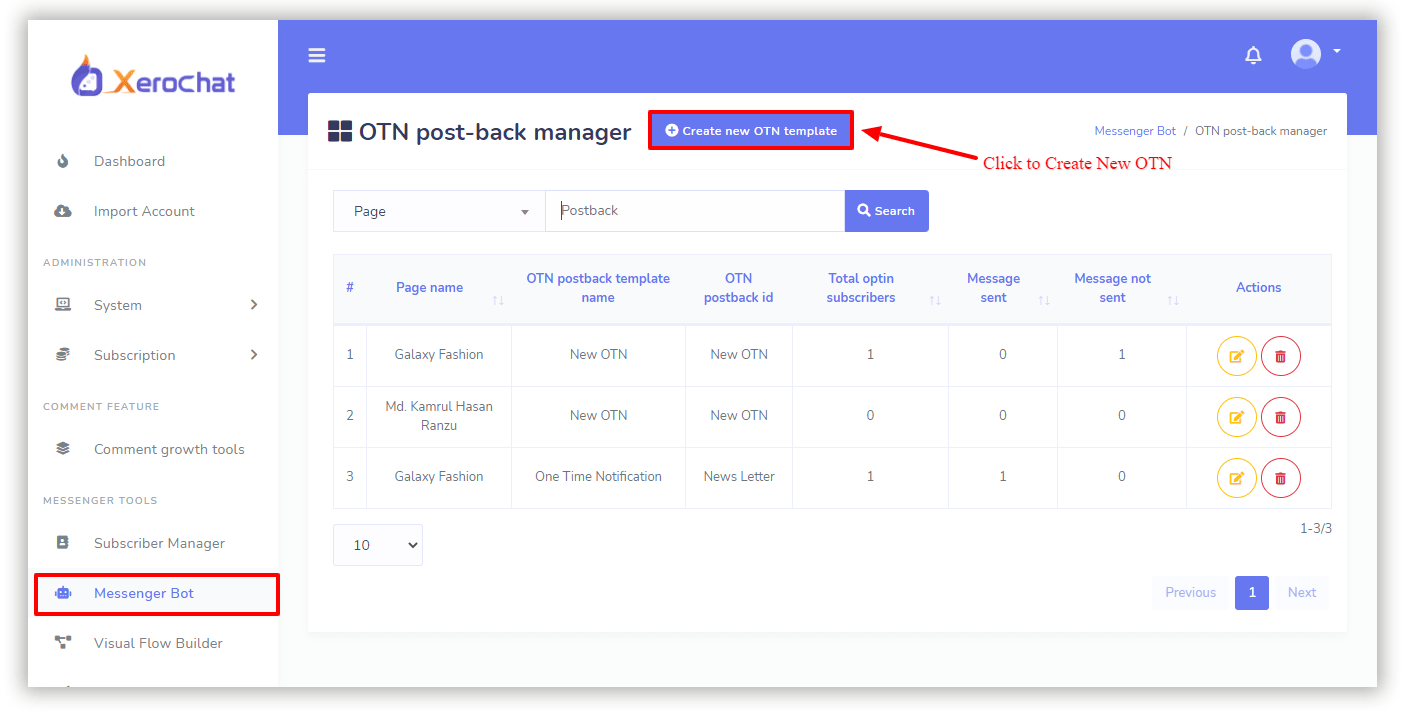
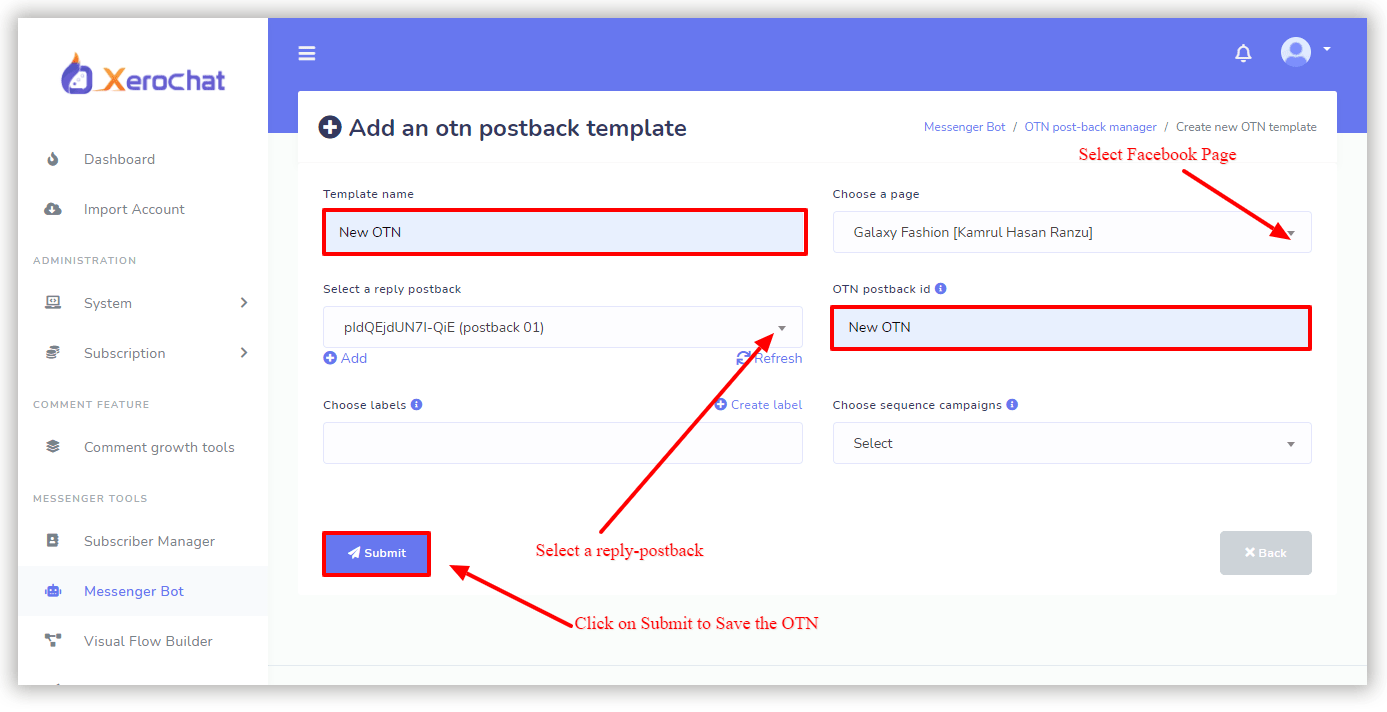
Click on the button to create a new OTN, and then fill up the forms to create an OTN. We need to give a name for the OTN, select the Facebook page for which we are creating the post-back. And then select a reply postback, which means when someone clicks on the OTN we will receive the token for the future promotional message, and then redirect them to the current conversation with a postback.
We can also choose labels and sequence campaigns for the OTN.
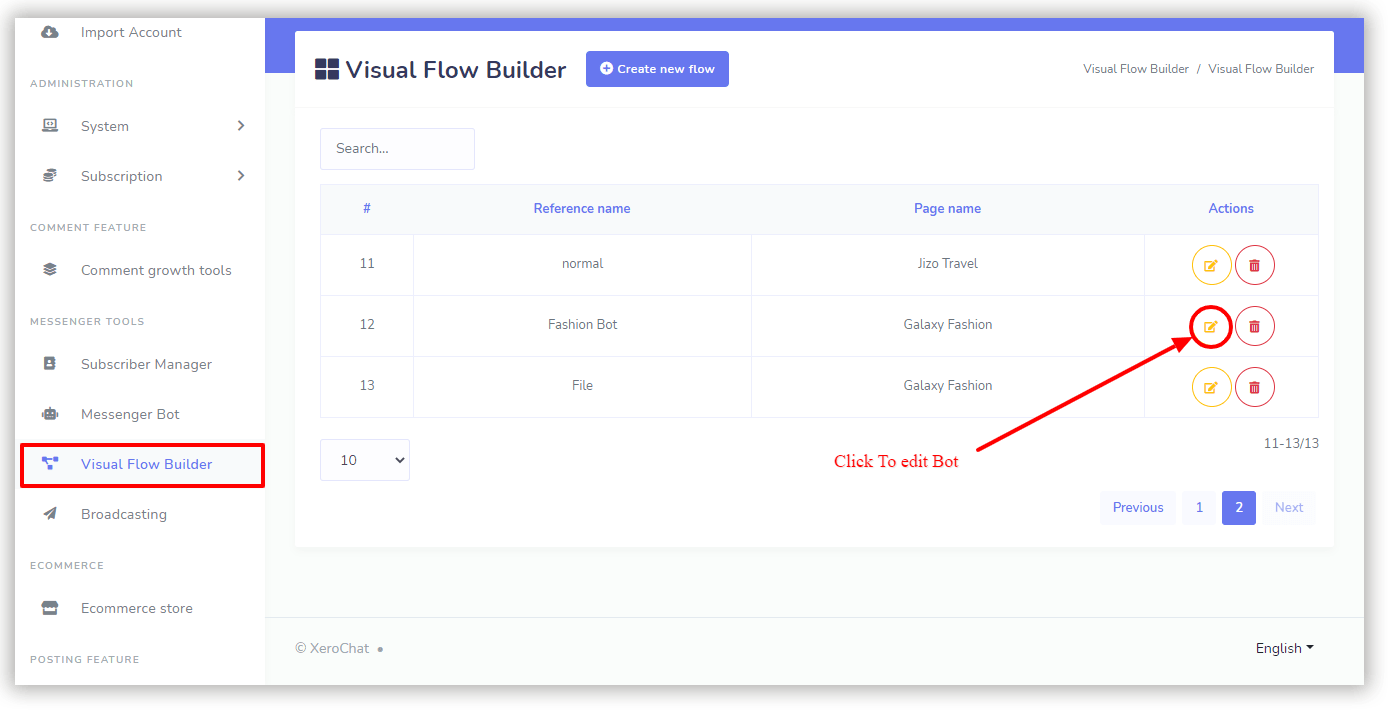
Step 2 (OTN integration with the Messenger Bot):
Now let’s integrate the OTN with the bot. To integrate this OTN we have just created, I am using the Visual Flow Builder (Add-on). We can also use the Messenger bot (Default Bot builder). Now we will add this OTN with an existing bot.
Drag the OTN element from the Doc menu and drop it on the canvas. Double click on the OTN to put a name and select the OTN Post Back Id, which we created from the OTN Post-back manager. Besides, we can set the Typing on display and time for delay in reply.
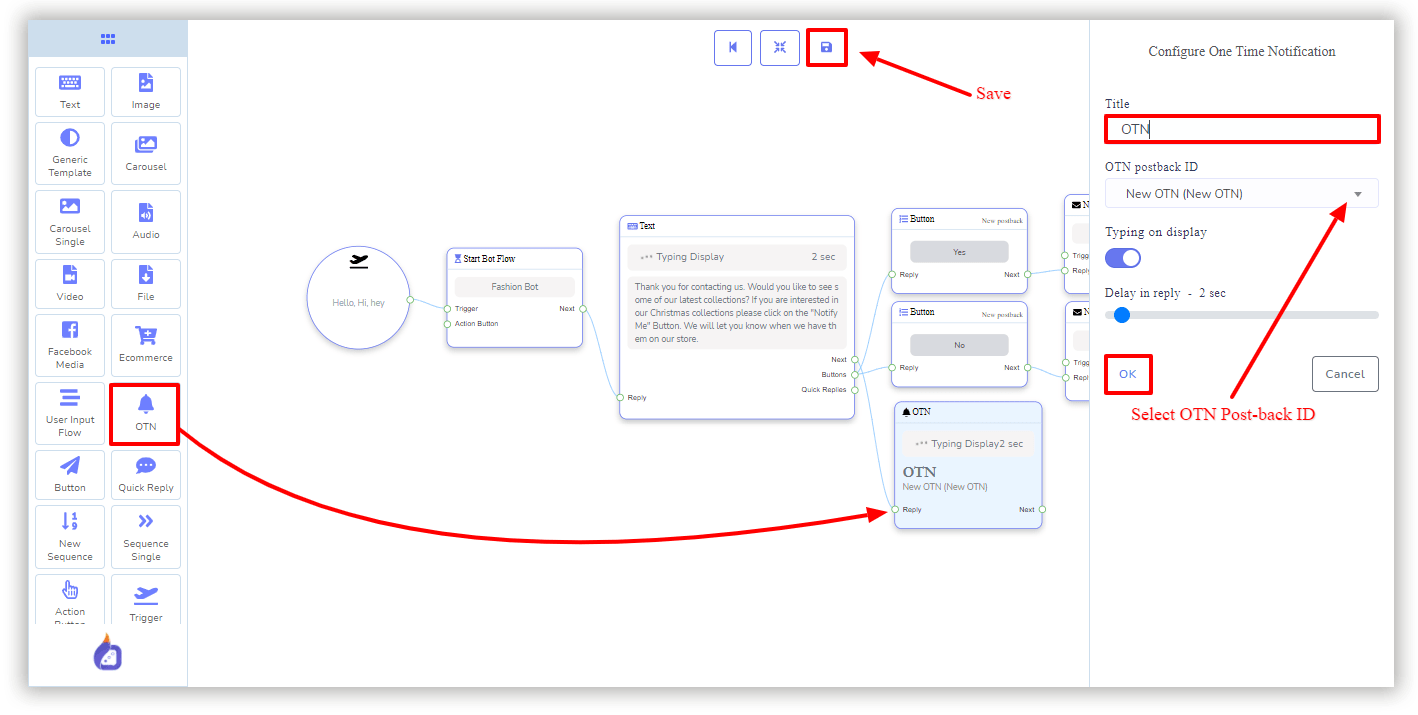
The OTN we have created and integrated with the bot will look like this way on Messenger.

Step 3 (OTN broadcasting):
From the left navigation menu of ChatPion, go to
Broadcasting-> OTN Subscriber Broadcast->Campaign list.
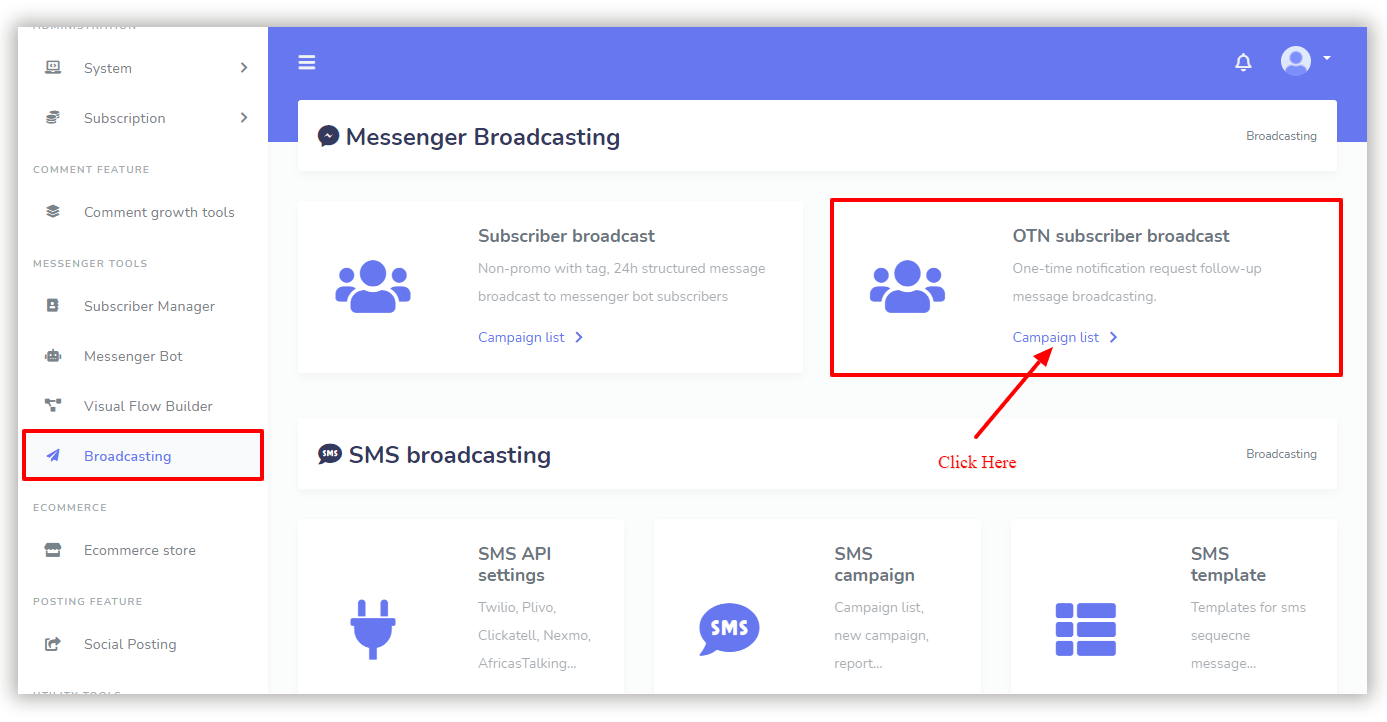
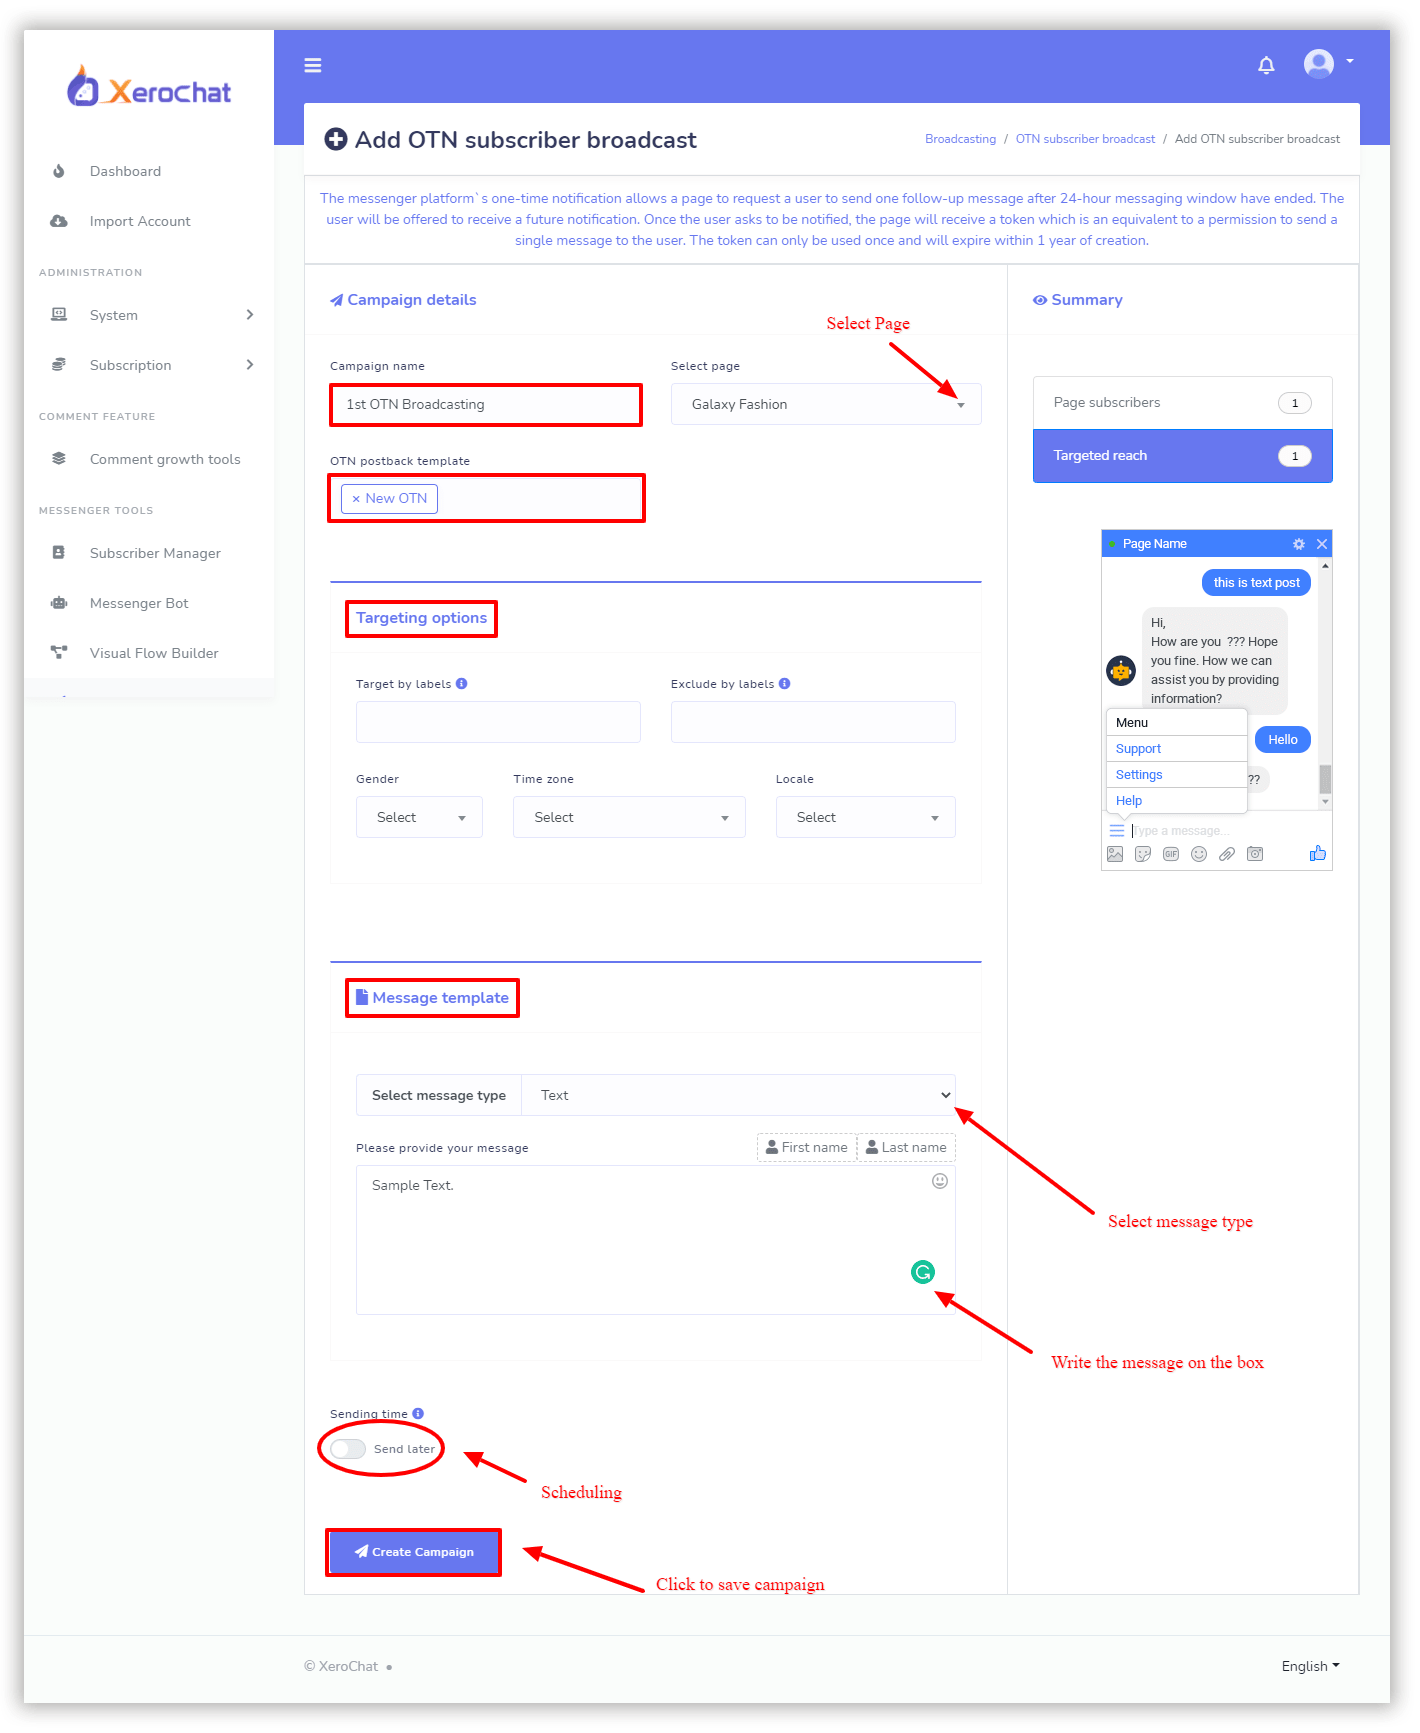
A page will appear with a button called “Create Campaign” and with a list of previously created campaigns. Click on “Create Campaign” to start creating a campaign for OTN broadcasting.

Upon clicking on the button, the interface to create an OTN Broadcasting campaign will come up. We need to give a name for the campaign, select the Facebook Page and then select the OTN postback template. Then we have a targeting option, we can use the targeting if we need to. We can target by label, exclude any label, Gender, Time Zone, and Locale for targeting. If we are not targeting, we don’t need to select anything on the targeting. Then comes the Message Template, select the message type from the drop-down list, and put the message on the message box. Besides, we can schedule this campaign or can just send the messages right away.
24H Promotional and Non-promotional (with Tag) Broadcasting:
We need to install an add-on to get this feature on ChatPion. We can get the add-on from Xerone IT’s Official site Xeroneit.net.
Facebook allows sending a promotional message within 24 hours of the conversation and a non-promotional message even after 24 hours. A non-promo message with Tags (Account_update, Confirmed_event_updat, Human_agent, Post_purchase_update, Non_promotional_subscriptions, etc.) could be broadcasted any time but should be Tagged with appropriate Tags available.
If we don’t obey the Terms and conditions while broadcasting, Facebook may restrict the messaging options for that particular page.
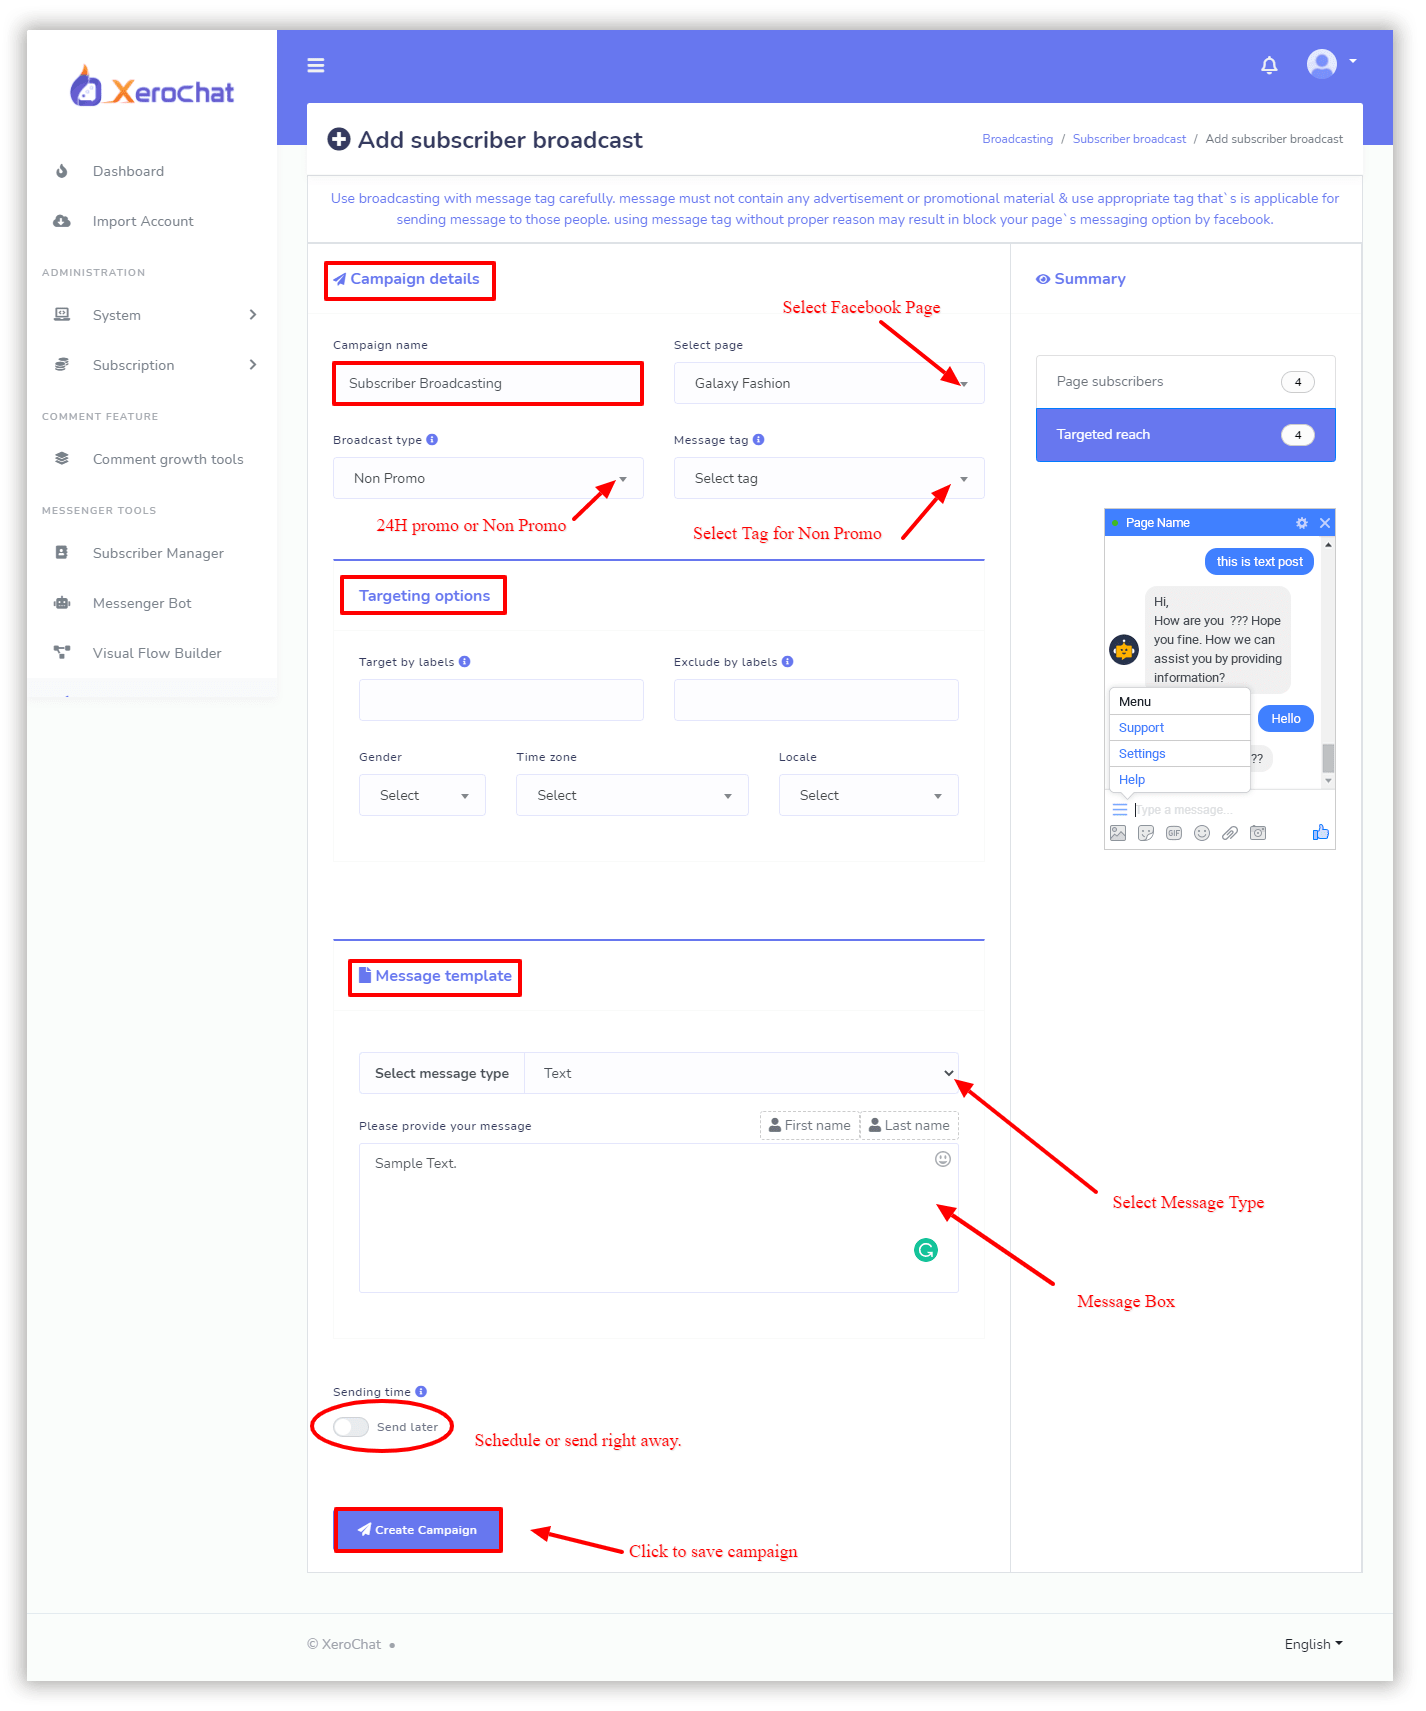
To create a broadcasting campaign, go to:
Broadcasting->Subscriber Broadcast->Campaigns

And then click on the “Create Campaign” button.

We need to give a name for the campaign and then select the Facebook page. Then select Broadcast Type from the drop-down list and select tag (for Non-promo). Then comes targeting, select your desired targeting options. After that select the Message type and write the message.
If you have any questions or have difficulties while creating Messenger broadcasting campaigns, please feel free to comment below. I will be happy to answer your queries.