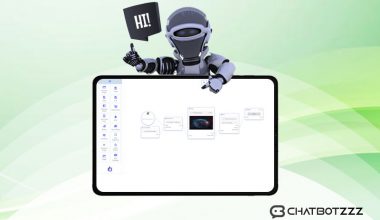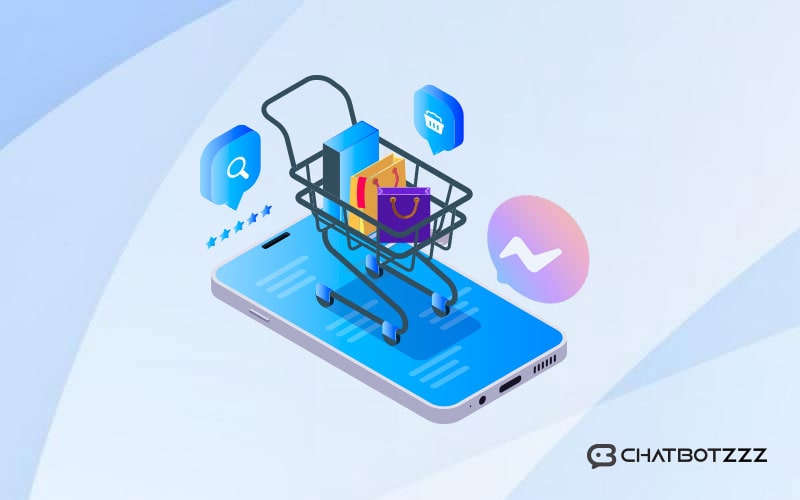
One of the most fascinating features of ChatPion is the eCommerce store. We can create a full-featured eCommerce store inside Facebook Messenger by using ChatPion. Customers can browse the store, add products to the cart, make payments, select delivery options, etc. right inside Facebook Messenger.
To avail a store online, we don’t require any separate eCommerce site. We can create an eCommerce store right inside Facebook Messenger by using ChatPion. Besides, the same eCommerce store could be accessed from outside of Messenger by using a browser (Chrome, Mozilla, Safari, etc.).
We will learn how to create an eCommerce store inside Facebook Messenger step by step.
Step 1 (Creating a Store):
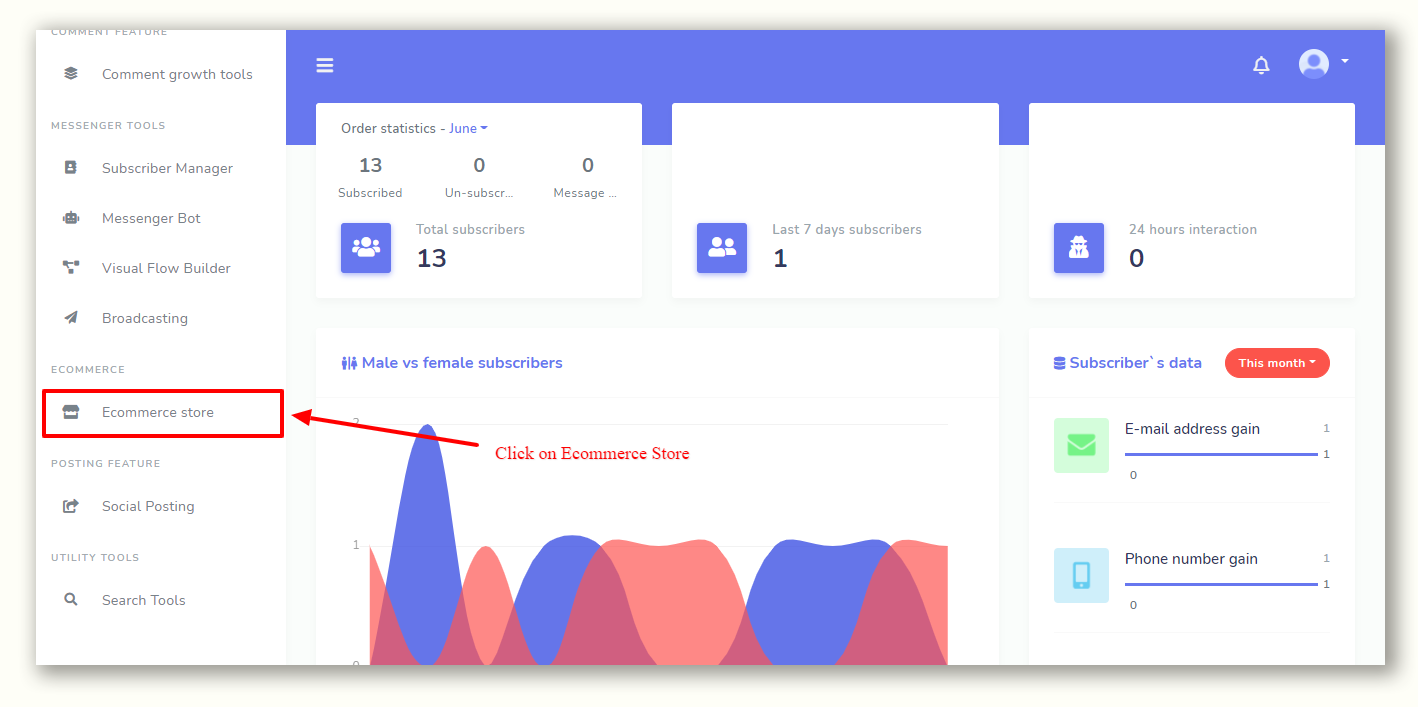
First of all, we will create a store. To create a store, from the left navigation menu of ChatPion click on “Ecommerce Store”.
Next, click on “Create Store”.
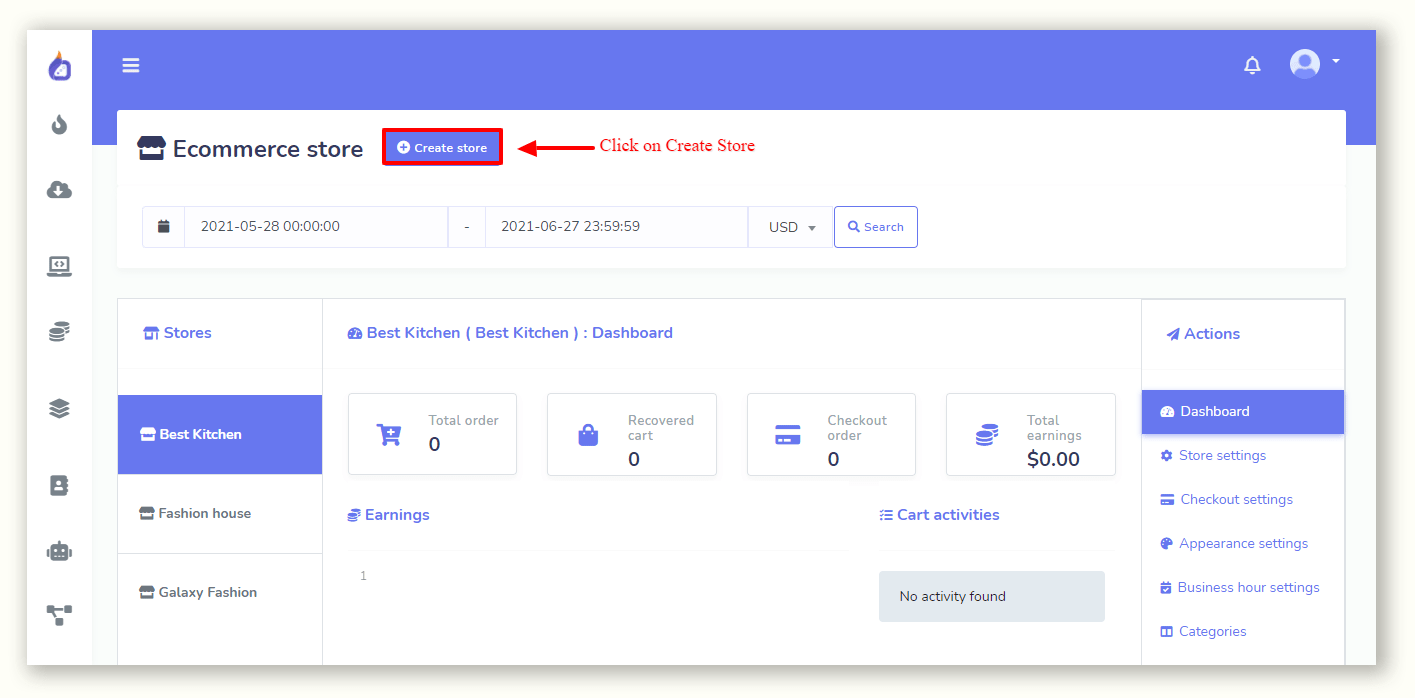
As soon as we click on the “Create Store” button, a form will appear with different fields. We need to fill up the details required for an eCommerce store. First, select the Facebook Page for which we will create the store and give a name for the store. Put an email address, fill up the address. After that upload a logo and favicon for the store, we can also add Facebook pixel id and google analytics id If we want to. Make sure to keep the status “Online”. Write the Terms of Service and refund policy if there are any. Finally, click on the “Create Store” button.

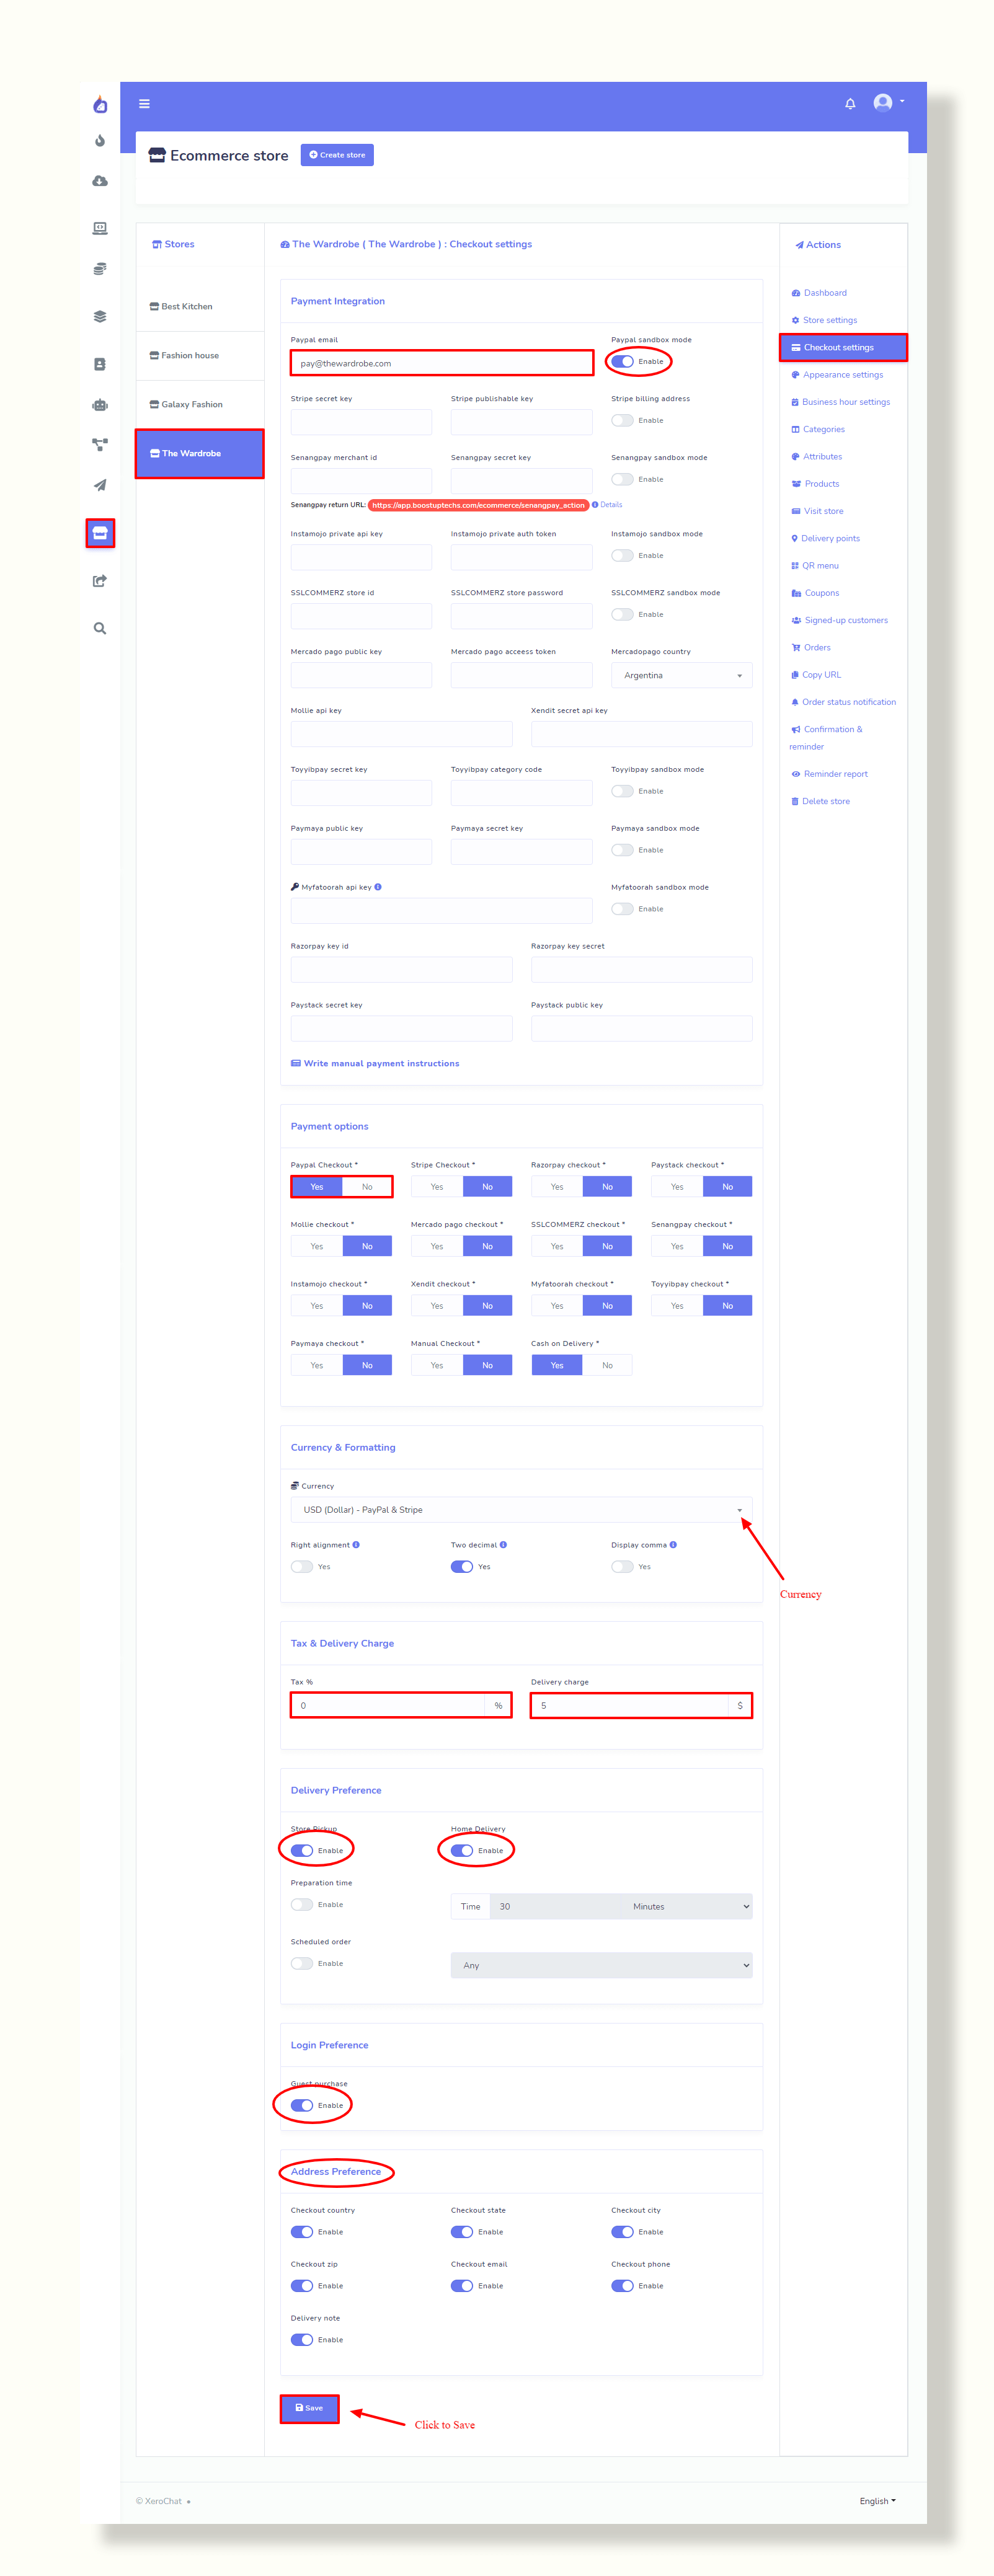
Step 2 (Adding Payment Methods):
Now we will add payment methods for the store. To add payment methods, click on the “Checkout Settings” from the Action menu. We can add various types of payment methods for the store. After adding payment information, we need to enable that payment option. Then we have currency and formatting, Tax and delivery charge, delivery preference, log in preference, address preference, etc.
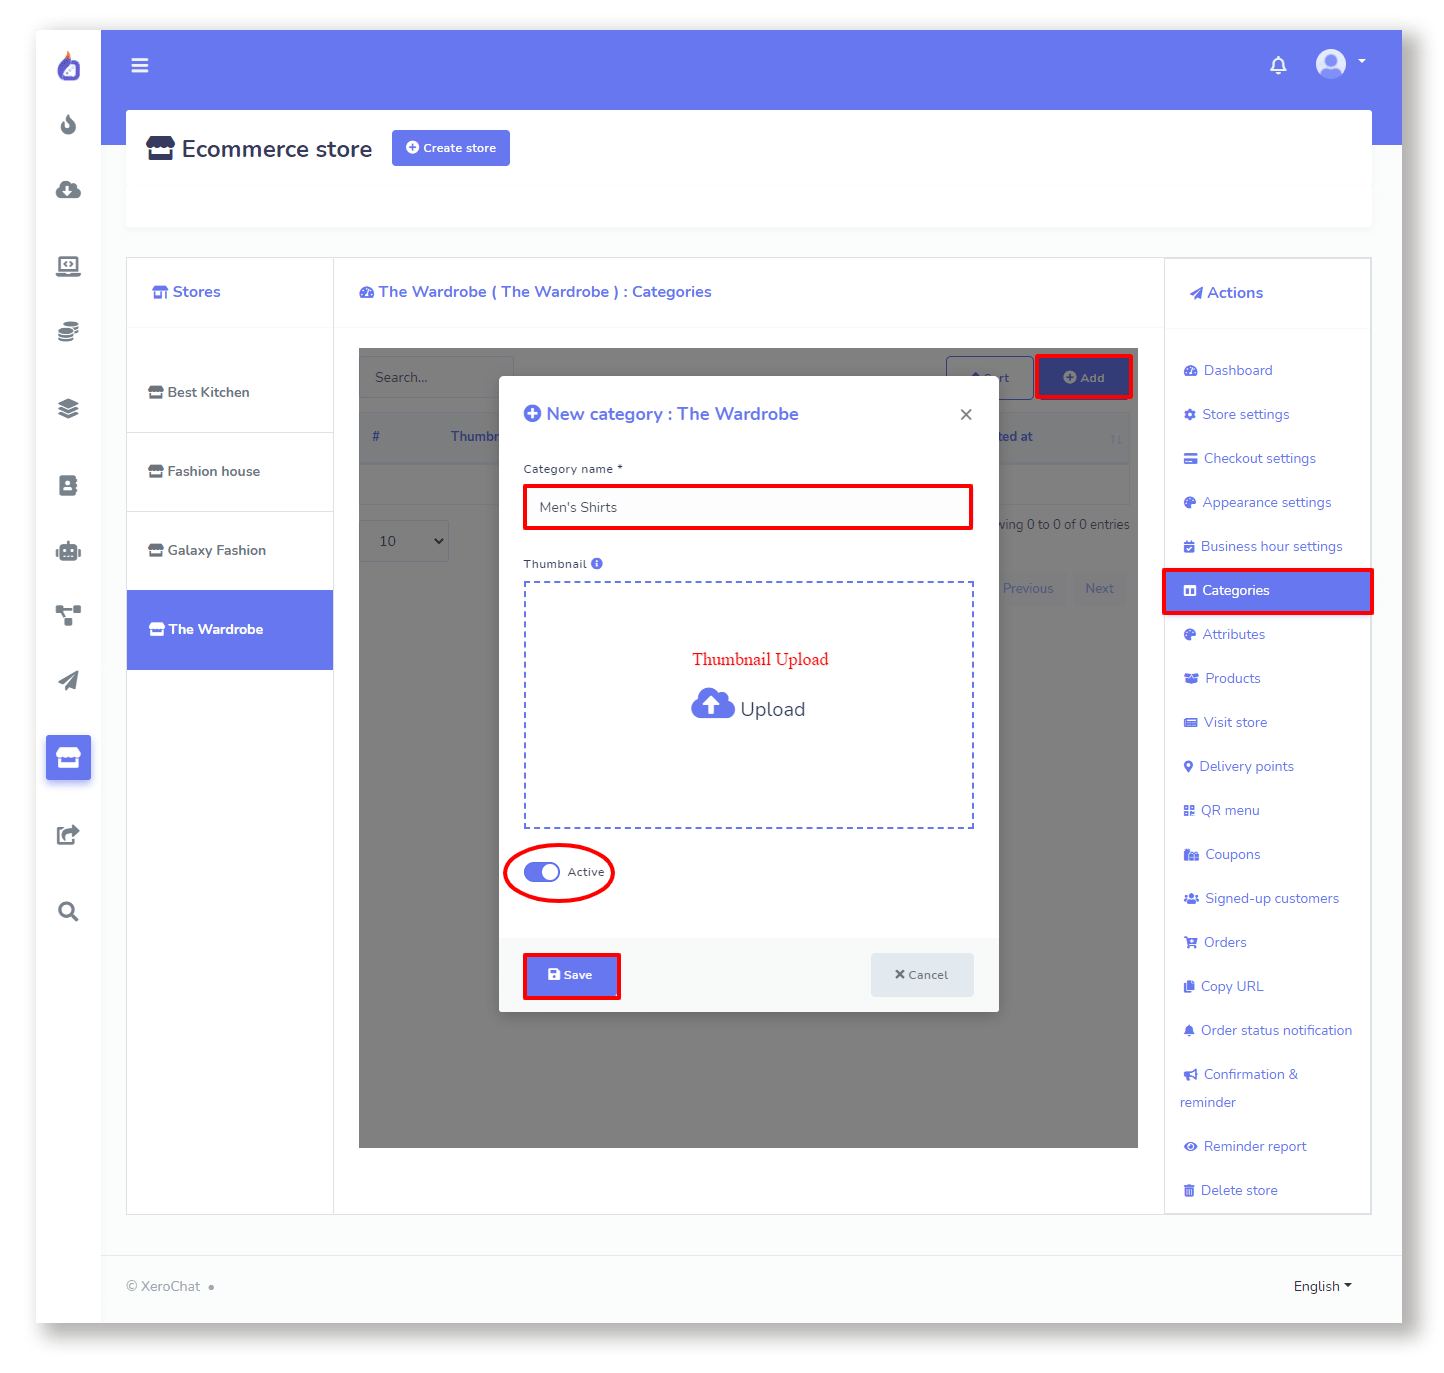
Step 3 (Adding Category):
From the Actions menu click on the “Categories” to add a category for the store. Go to
Categories--> +add
Write the name for the category and upload a thumbnail (Optional) for the category and save it. We can add as many categories as we want.
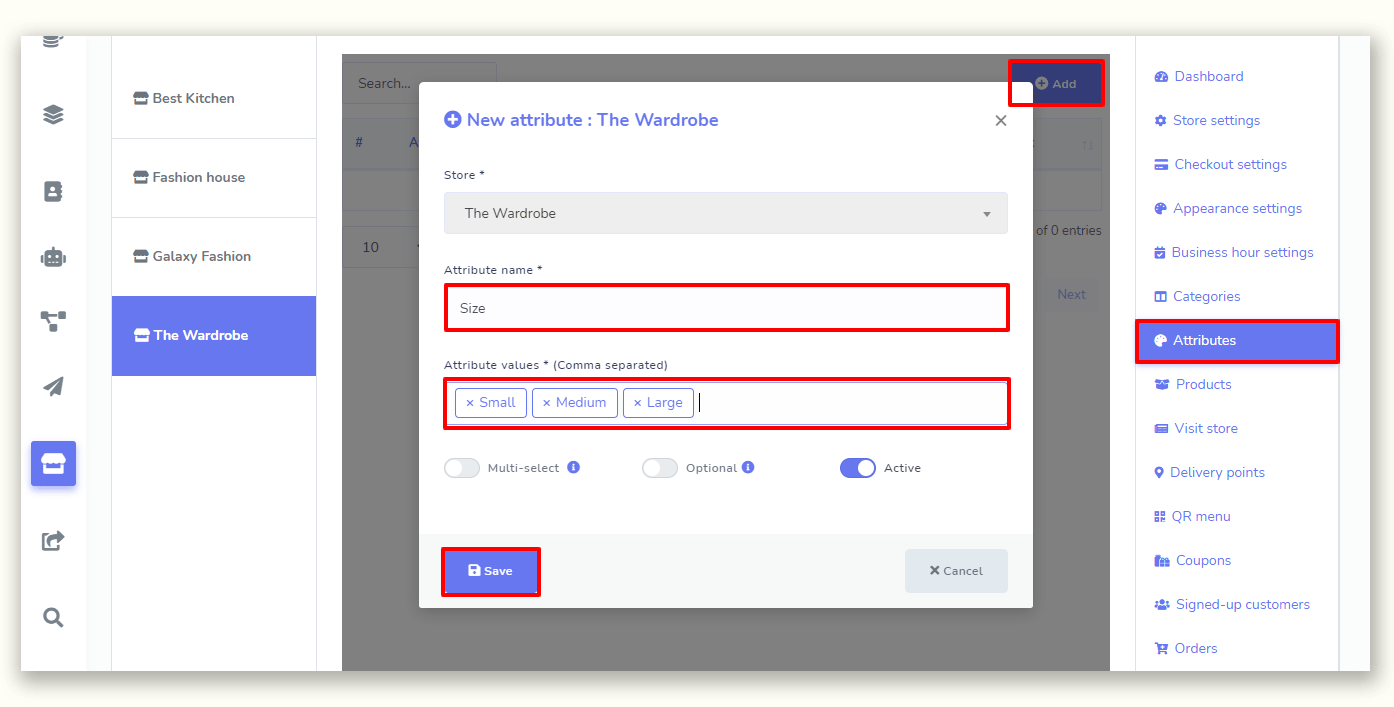
Step 4 (Adding attributes):
Attributes define a product’s characteristics, like size, colors, etc. To create attributes, go to “Attributes” from the Action menu. Then click on “+Add” button and put an attribute name and put attribute values (separating values by commas) on the respective field. And then select if it’s “multi-select” or “Optional”. Click on the Save button to save the Attribute. Here in this example, I will add an attribute named ‘Size’ and values are Small, Medium, and Large. In this case, the Size attribute is not multi-select nor it’s optional. Because Buyers must select the size of the dress and they can’t select multiple sizes for the same dress.
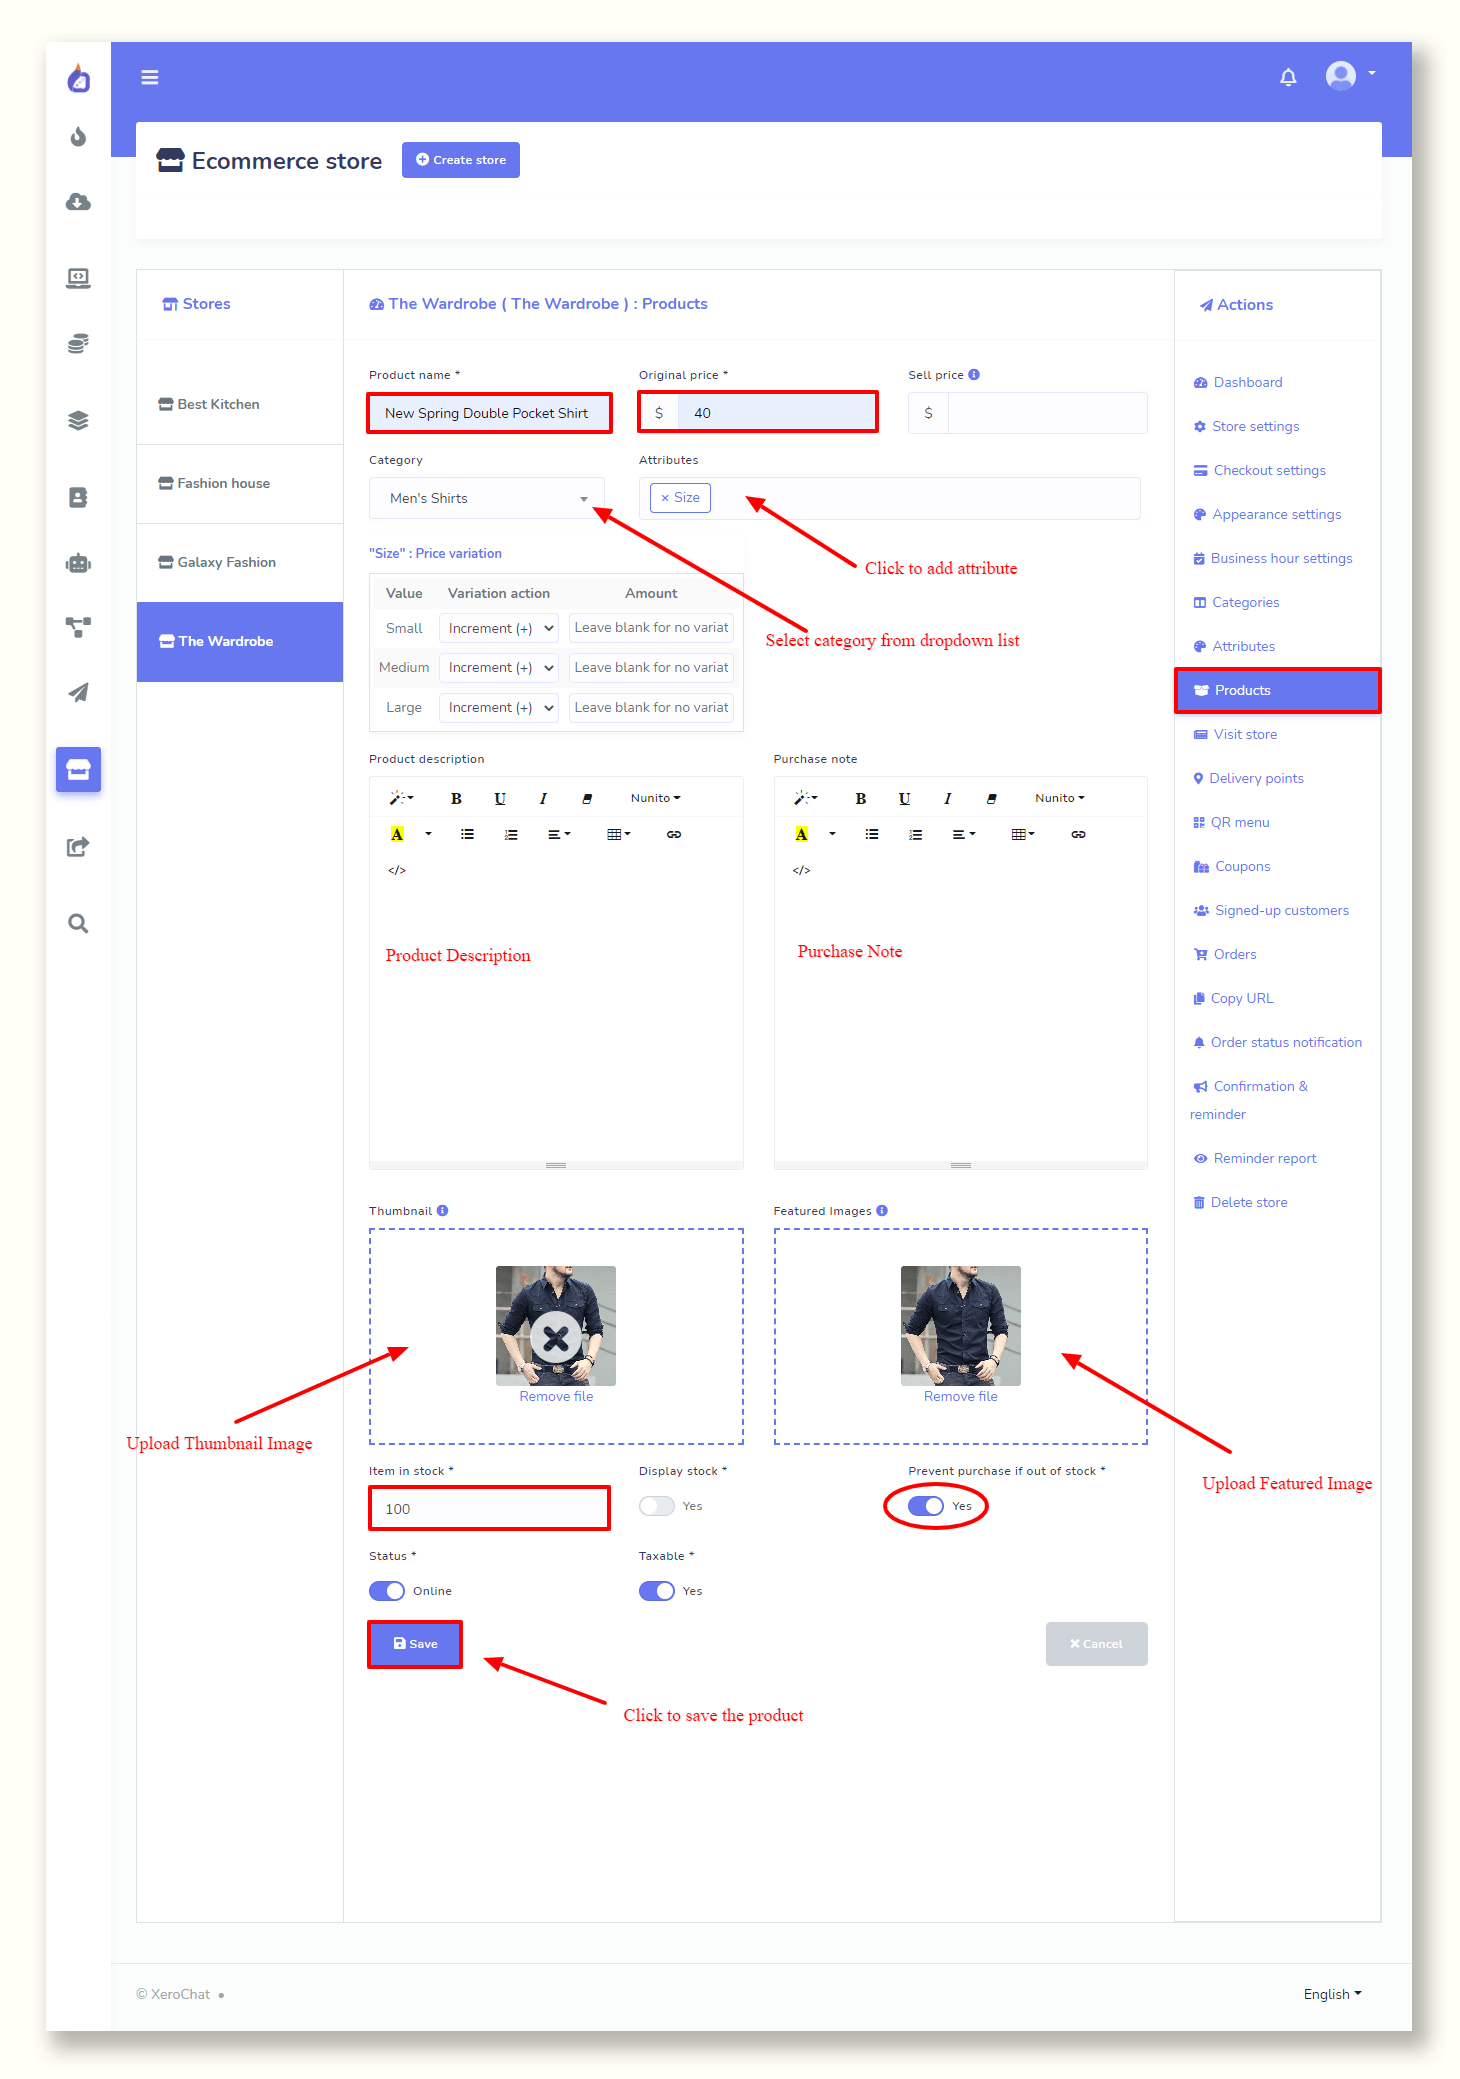
Step 5 (Adding Products):
To add a product, from the Action menu click on the “Products”. Then write the name of the product, put a price, if there is any sale price, we can add that too. Then select the category of the product and add attributes if we have any for this product. After that write the product description and purchase note if there is any. Upload the Thumbnail and Featured Image of the product. We can also add the number in stock, display it, and prevent purchasing if the product is out of stock.
Finally, click on the Save button. We can add as many products as we want.
Step 6 (Adding Delivery Points):
We can as well add delivery points if we want to. Click on the “Delivery Point” from the Action menu, then click on the “+add” button. Give a point name and point details. Finally, click on the Save button.

Step 7 (Creating Coupon):
We can also add coupons for the store. Click on “Coupon” from the action menu and then click on “+add” button to add coupons. Now select products for which the coupon will be applied, leave it blank to apply this coupon for all the products in the store. There are 3 types of coupons, select the one you want to use. Put the coupon code and Coupon amount.
If you have selected Percent as the coupon type then this number will be the percentage of the amount and if you have selected the fixed cart or fixed product then this number will be the amount of the coupon.
The steps discussed above are enough to create a store. Few more features could be used while creating the store.
Appearance settings:
This appearance setting allows us to change the store’s colors and change the style of views, product sorting types, customize “Buy Now Button” and “Store Pickup Title”, and many more.
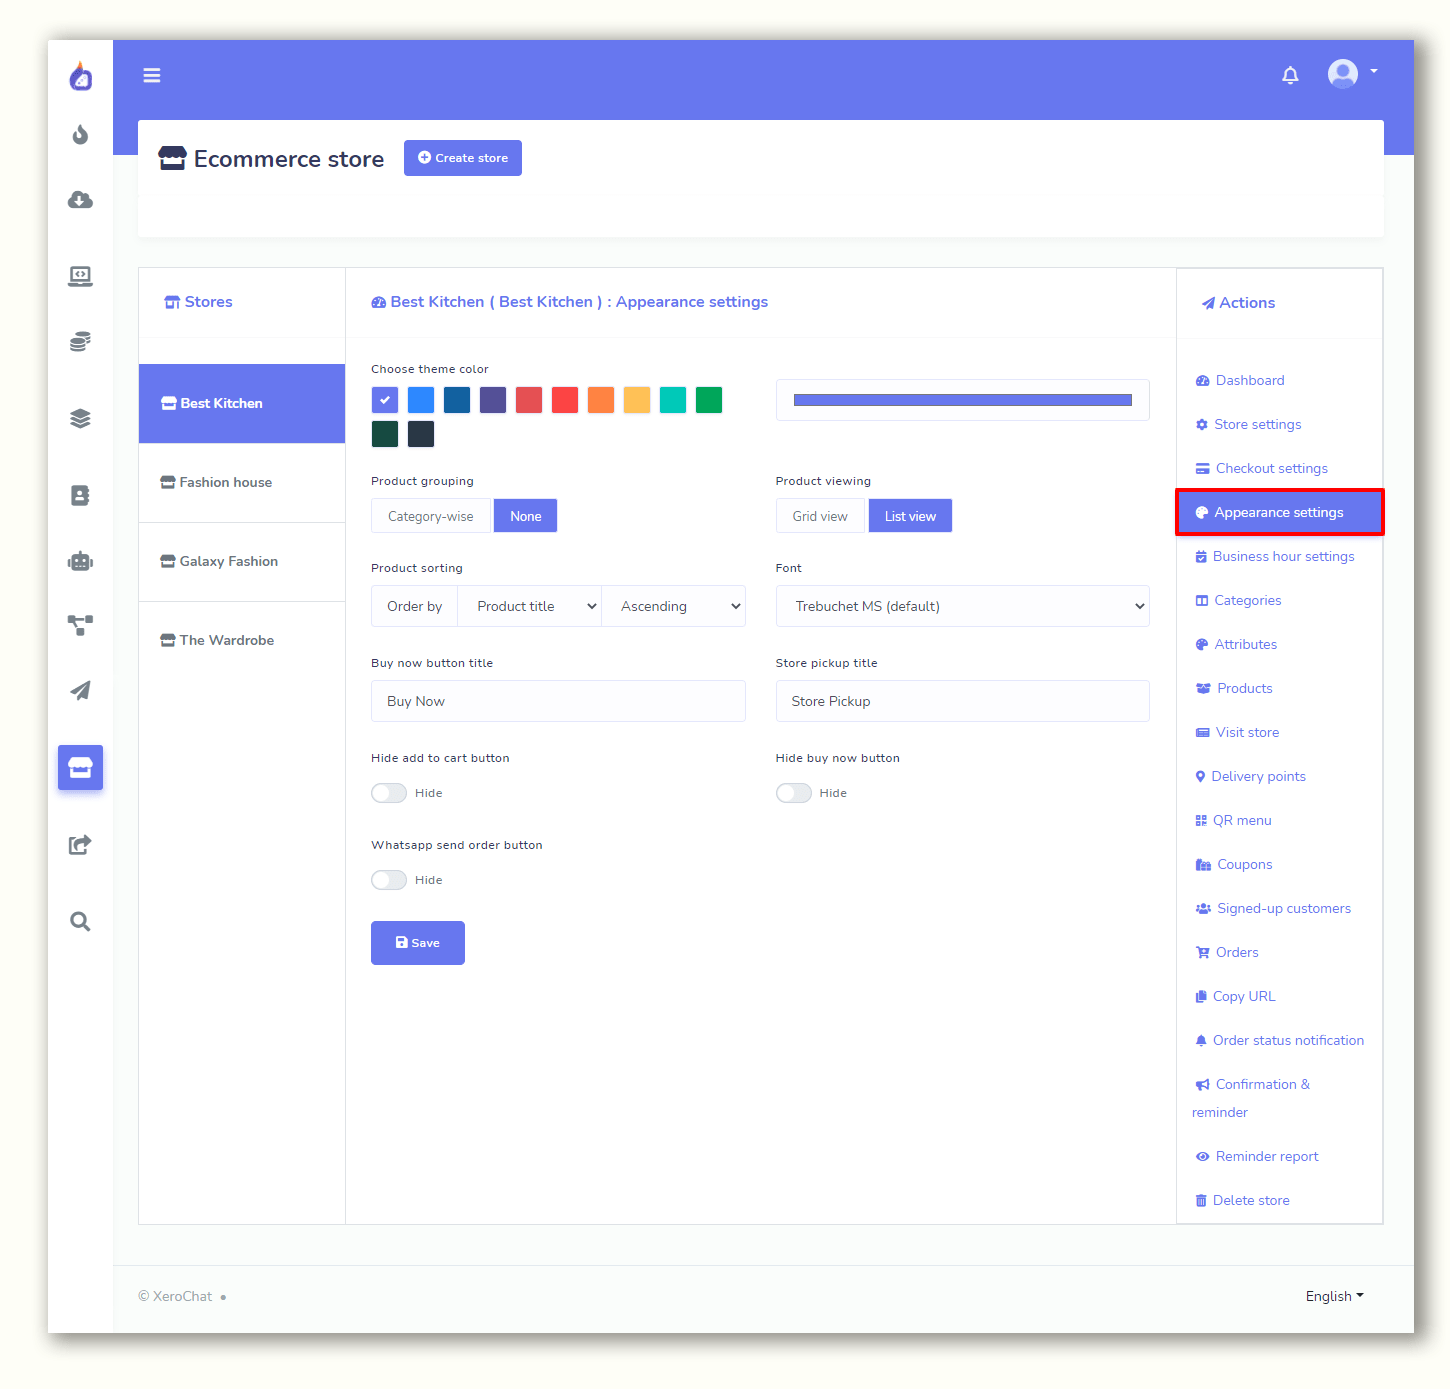
Business Hours:
We can also set Business hours for different days or select always open.
Visit Store:
We can check the store’s look by clicking on the “Visit Store” from the Action menu.
QR Code Menu:
We can generate a QR code for the store. There are two types of QR codes: Messenger QR code and Outside QR code. When user’s Scan the QR code the store will be displayed. QR code is important for Restaurants. Restaurants can print the QR code and display it on the table to scan for the customers. From there they can select the food, select the delivery Table, and make the payment online.

Orders:
From the “Orders” Store owners can change the order status, and the order status will be sent to the customer’s Facebook Messenger.
ChatPion has all the features that are required to operate an online store or eCommerce Store. After creating the store, we will integrate the store with Facebook messenger. Now, we will see how to integrate the eCommerce store into Facebook Messenger.
Integrating the Ecommerce Store on the Facebook Messenger
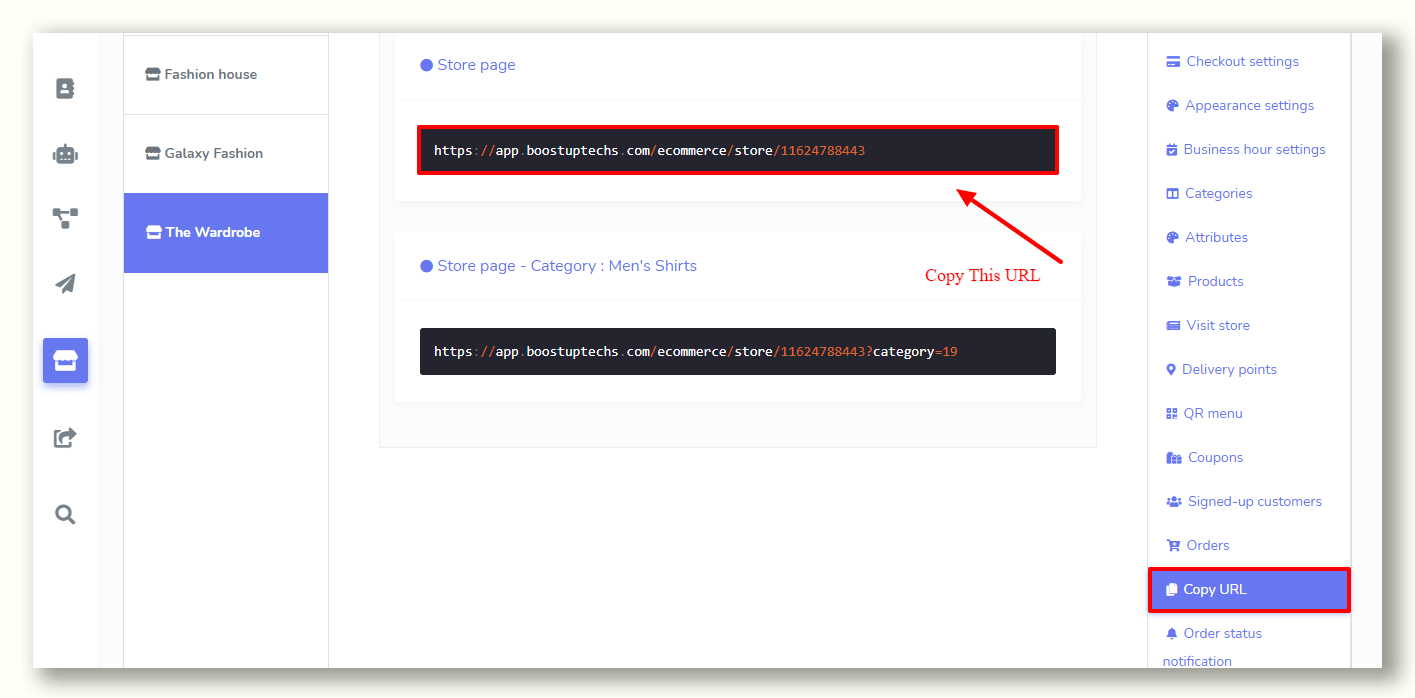
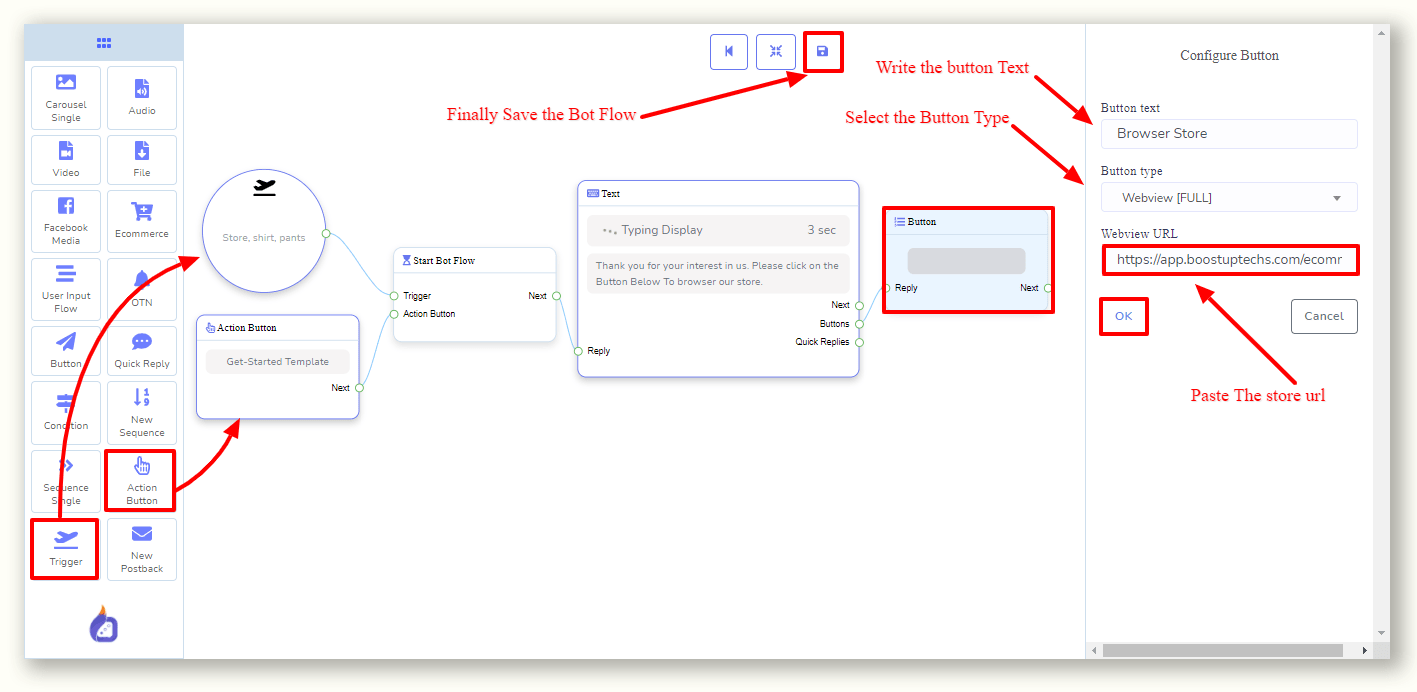
We can integrate the eCommerce store to any existing bot or we can create a new bot to integrate the store. We can integrate it from any post-back or with the Action Buttons like “Get Started” also we can trigger it for the keywords. Before we go to the Messenger Bot, we will need the store’s link. To get the stores link, click on the “Copy URLs” from the Actions menu and then copy the stores URL from there.
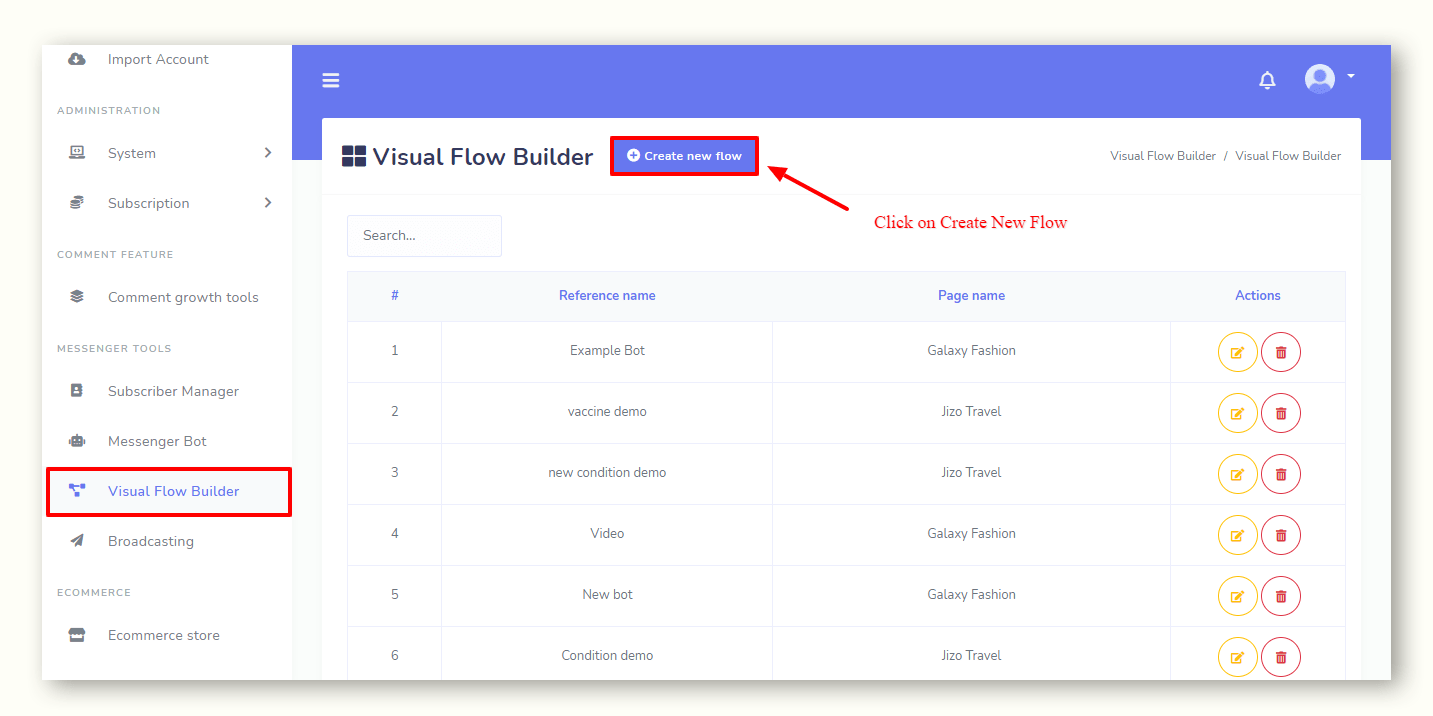
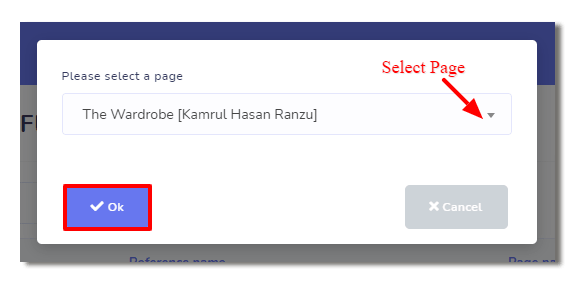
We will do this from the Visual Flow Builder (A ChatPion Add-on to create Bot). From the left navigation menu of ChatPion’s dashboard, go to “Visual Flow Builder” and then click on “create new Flow” or edit an existing bot to integrate the eCommerce store.
Then select the Facebook Page and click the “Ok” button to create a flow.
Drag and drop the Trigger and Action button from the Doc menu to the canvas. And then connect them with the “Start Bot Flow”. Take Drag a Text and Button component and connect them accordingly. Then put the Store link on the button. When the user will click on the button the eCommerce store will open up on Messenger.
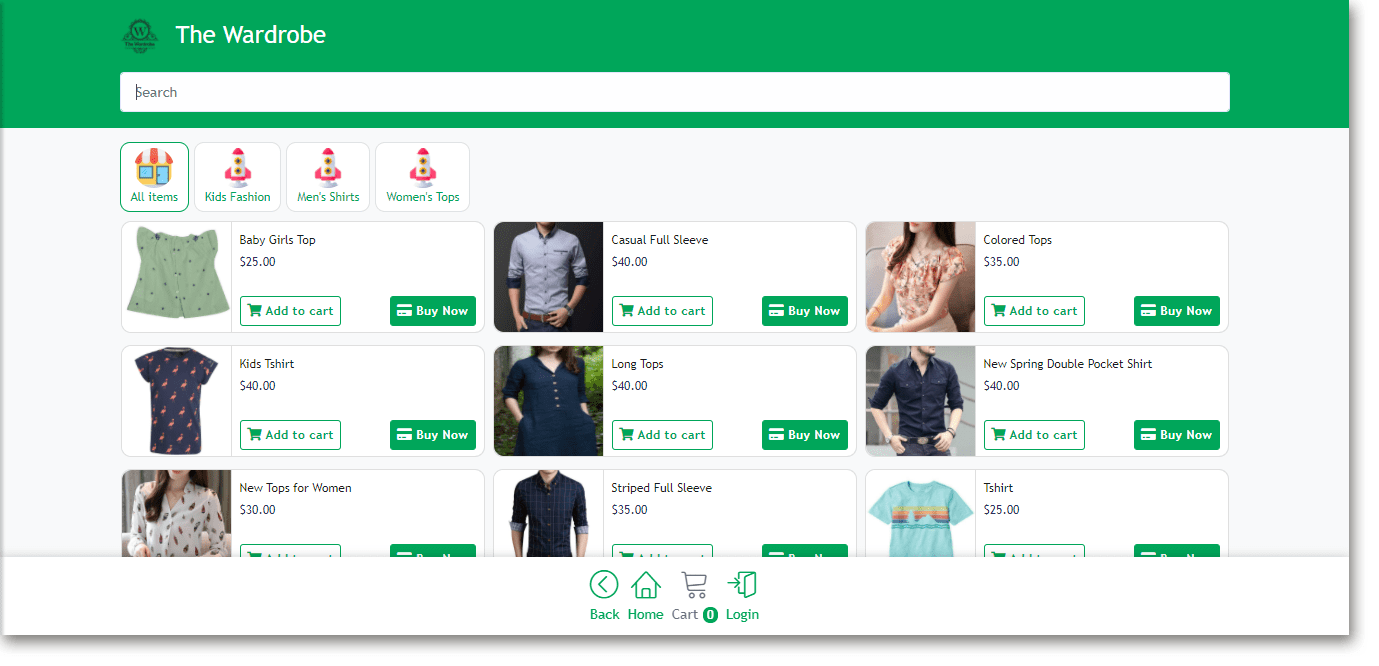
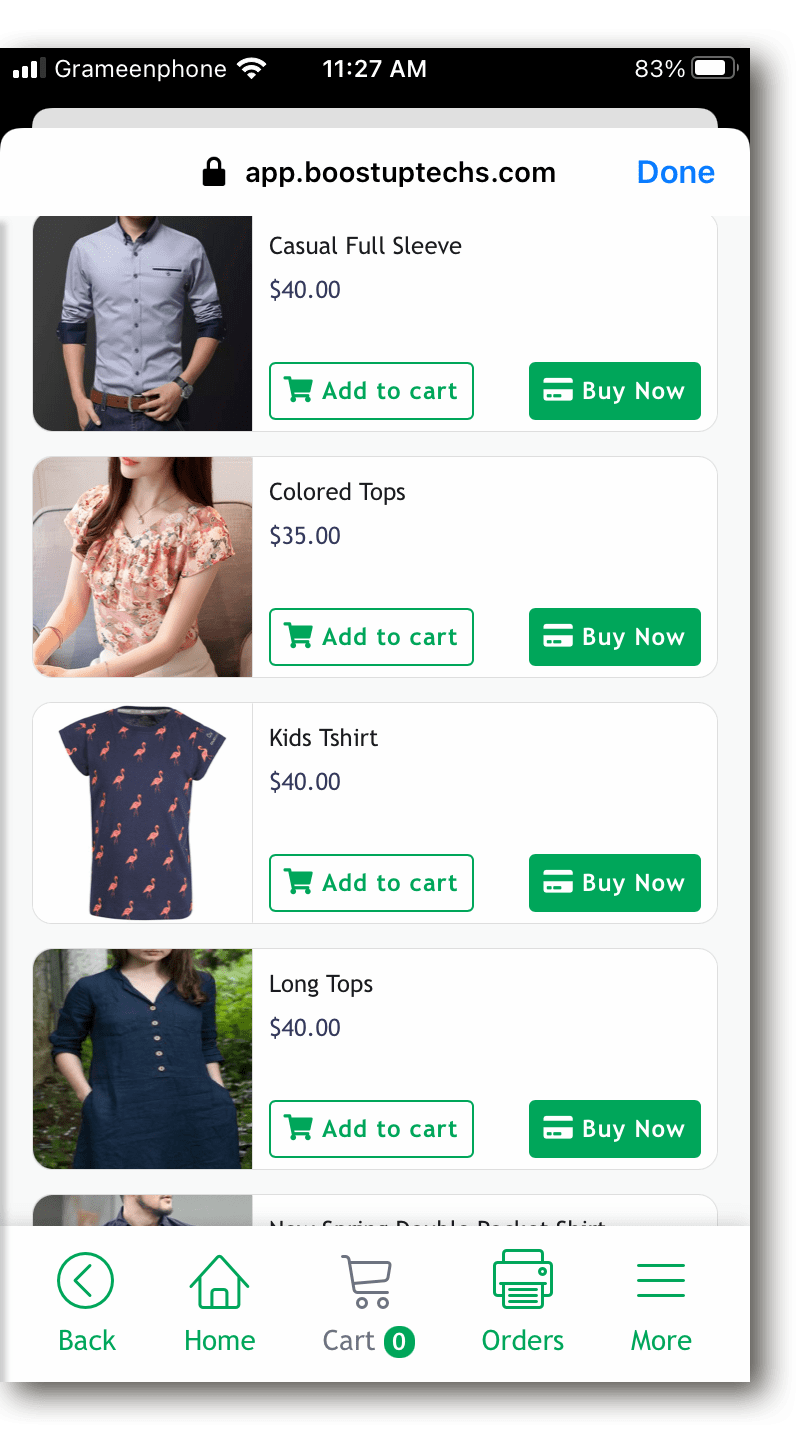
The ecommerce store we have just created should look this way in the Messenger. It looks pretty cool, isn’t it?
This is how we can create an eCommerce store and integrate it into the Facebook Messenger Bot. If you have any questions or find any difficulties while creating an eCommerce store, please feel free to comment below. We will be happy to help you.